Introduction
Thank you for purchasing code. It really means a lot and It's our pleasure to serve top-notch service to you. Thank you so much for choosing WRTeam . If you have trouble with the code and documentation please contact to our Support Team Here
Elite Quiz Admin Panel
How to Install Elite Online on Your shared hosting?
- Create your domain or subdomain in your shared hosting
- Create an empty database in your shared hosting and remember this credentials:
i. database name
ii. database username
iii. database password - Upload your downloaded admin panel zip in your server , unzip it , head to php code (version) folder , and move your all files to your root domain path
Note :- .htaccess file is necessary , check that it exists , if not, on the hidden file option and move to your admin panel's root file - Now navigate to the url where your project is located.
ex. mydomain.com or subdomain.mydomain.com - The installation screen should appear and guide you in the process.
Thats it! Now you are ready to run your first Elite Online : https://elitequiz.wrteam.in
Default Login DetailsUser: admin
Pass: admin123
Set System Configurations
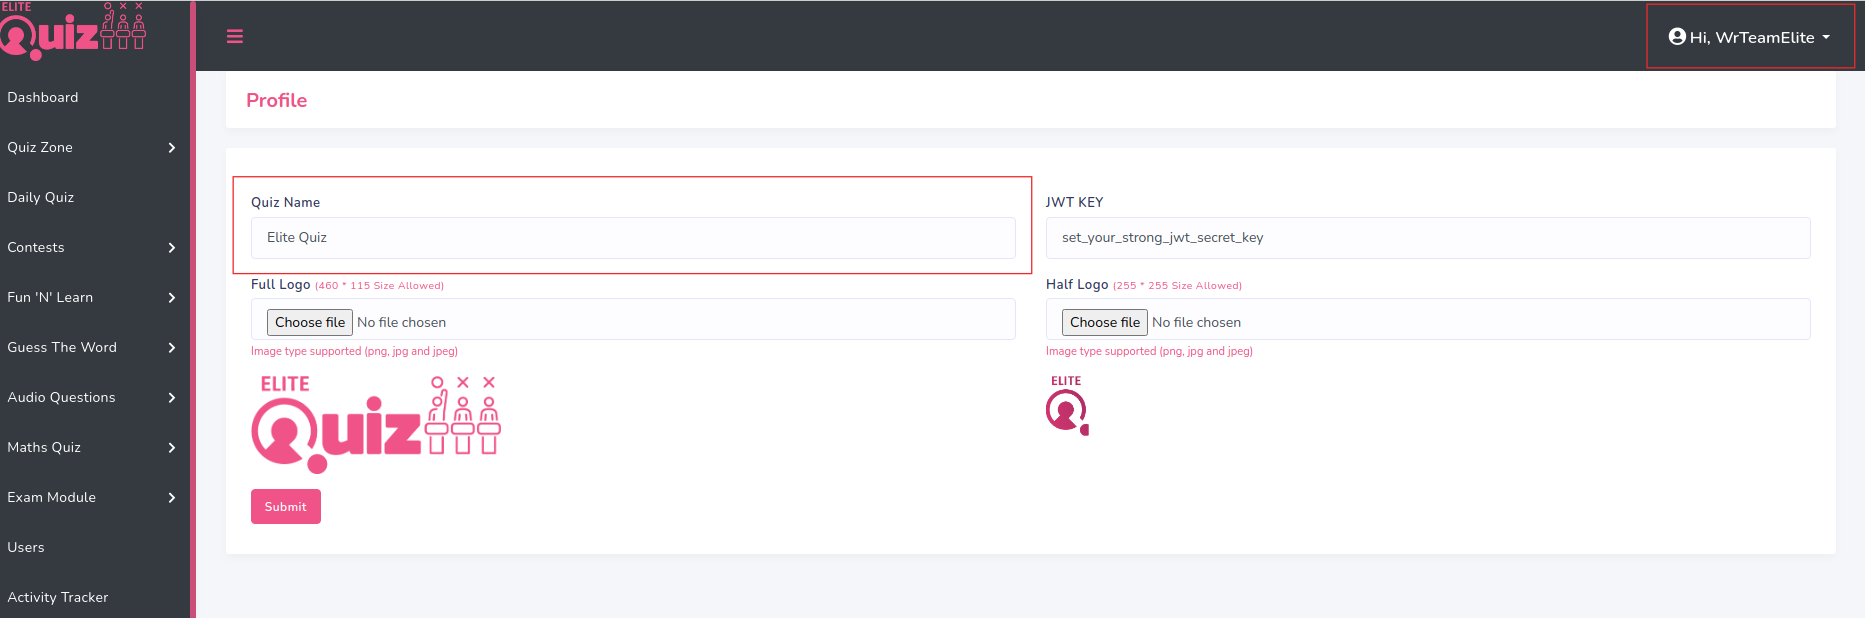
Change Quiz name and logo in Profile menu

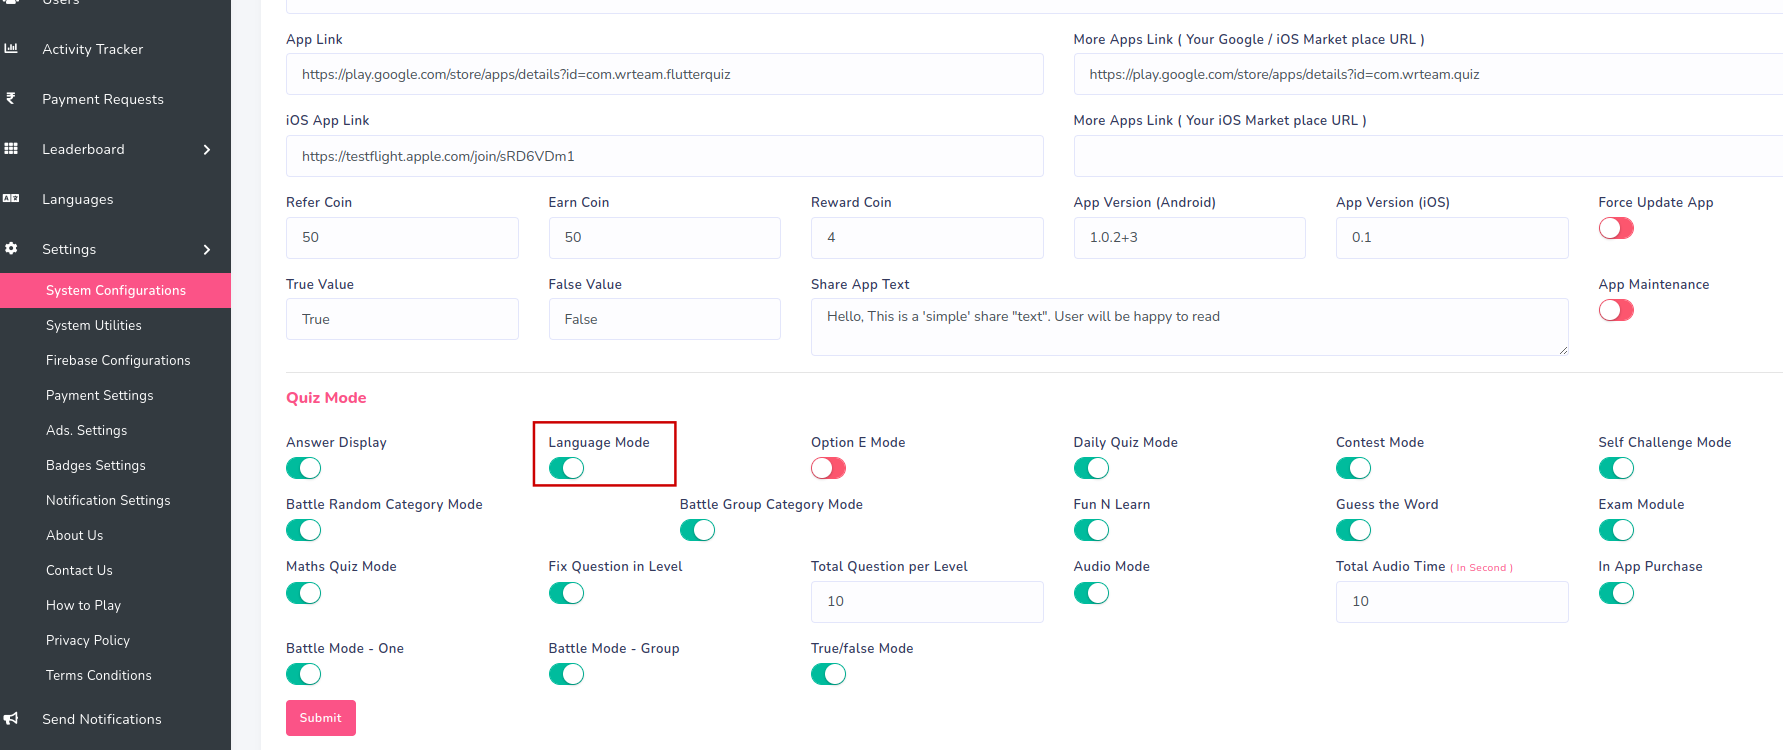
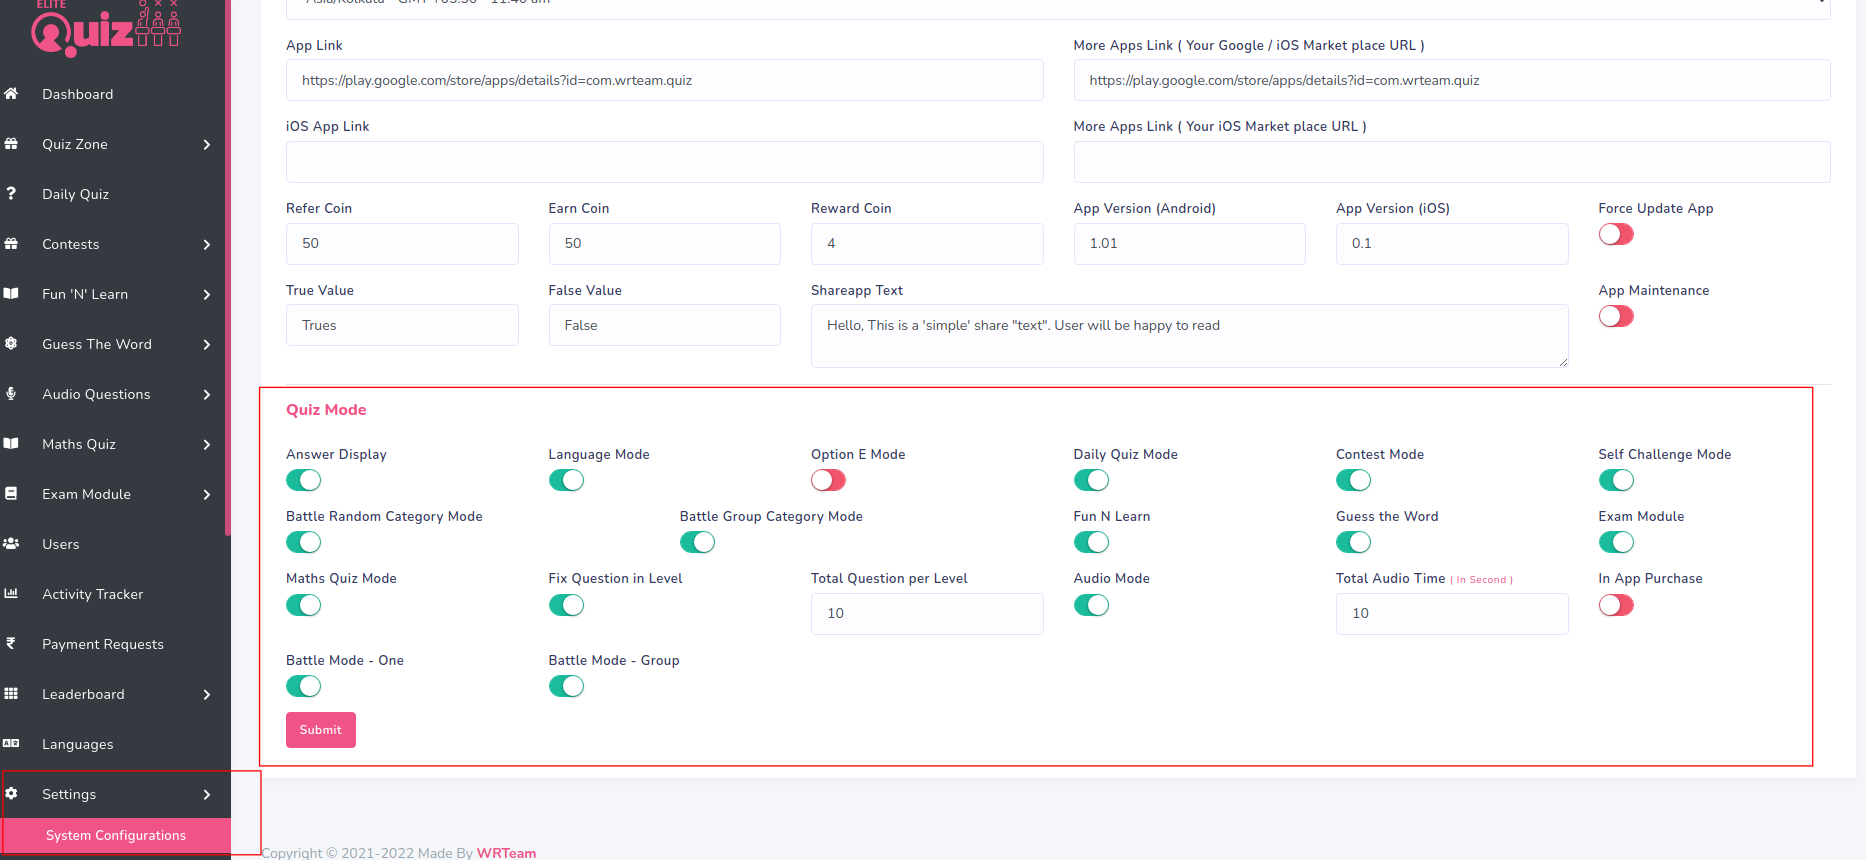
From here you can set System & App Timezone, App Play store or market place Link, Enable / Disable Answer Display, Language Mode, Option E Mode, Force Update App, Daily Quiz Mode, Contest Mode, Battle Random Category Mode, Battle Group Category Mode & In App Purchase. Manage App Version and Update Shareapp Text. Set fix Question in level

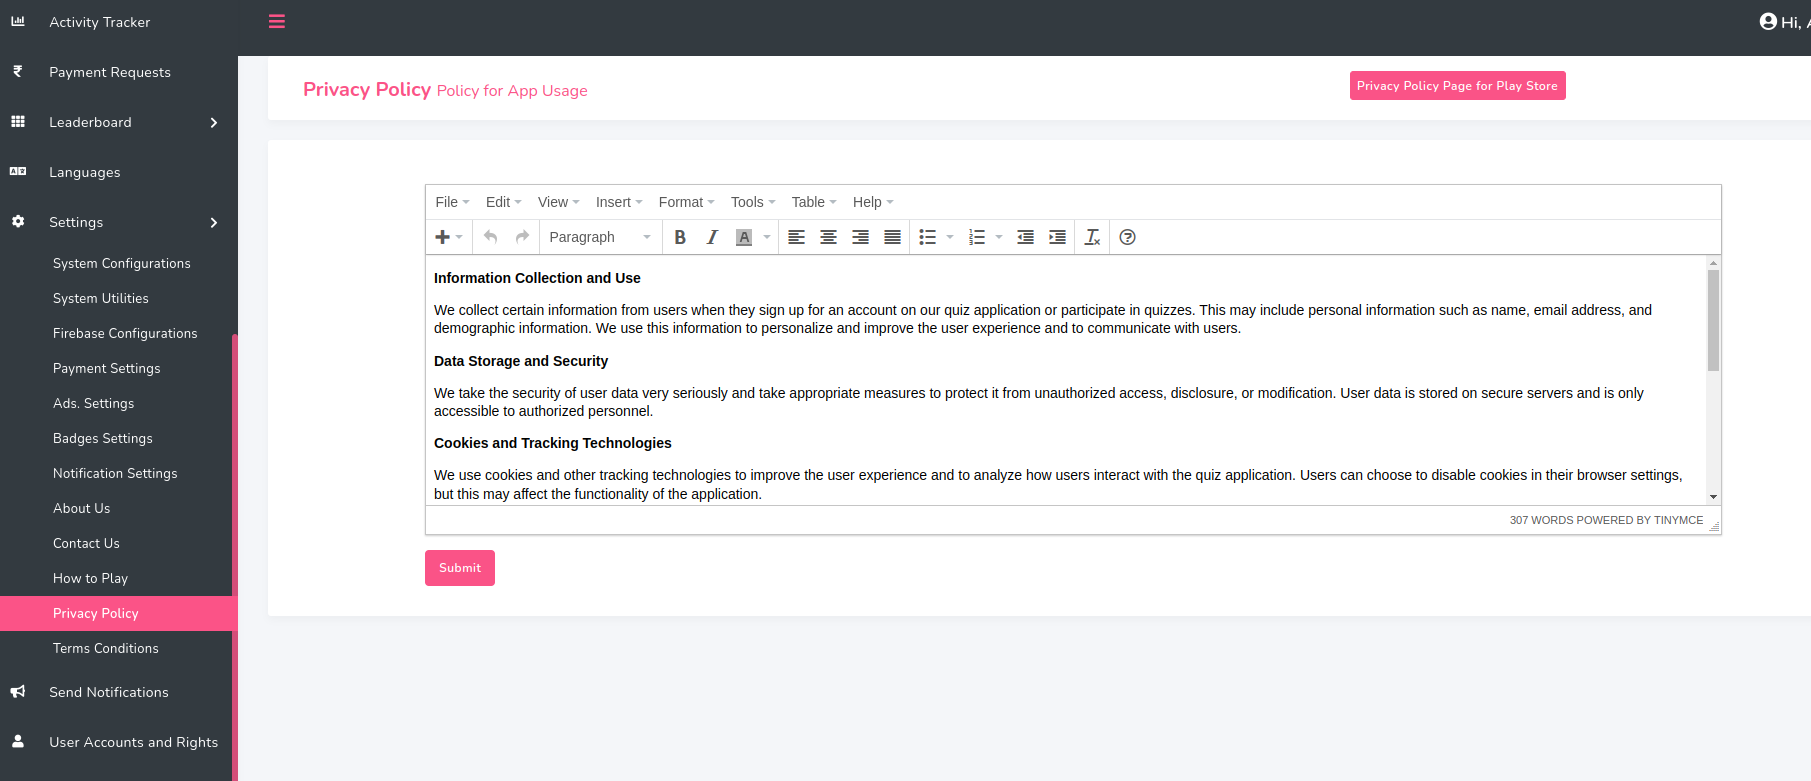
Set Privacy Policy
Set Privacy Policy for your website and app.
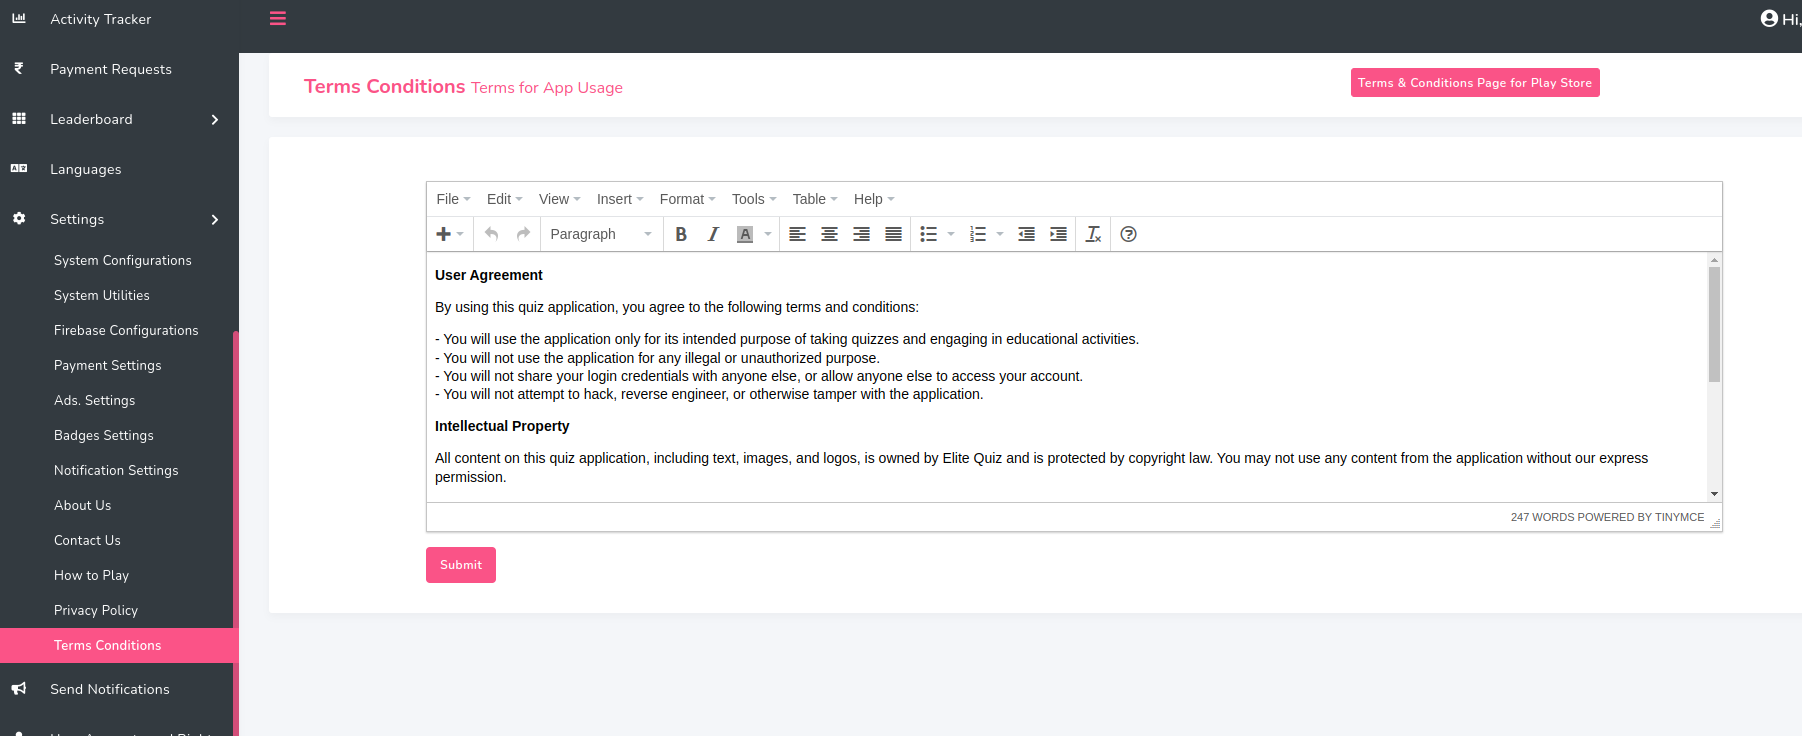
Set Terms Conditions
Set Terms Conditions for your website and app.
About Us Content
Set and manage your about us content for app.

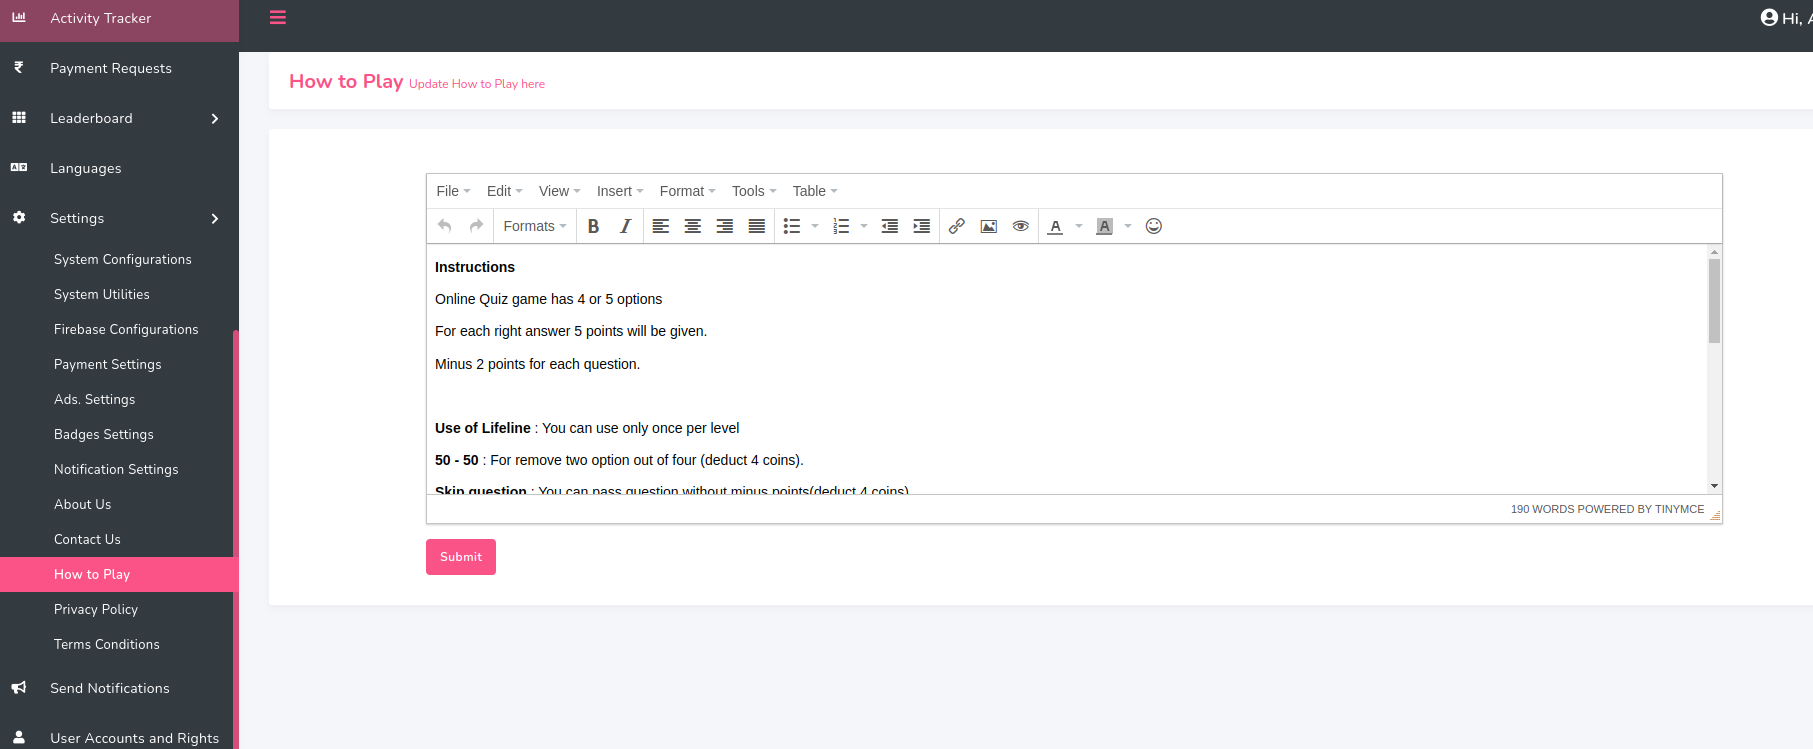
How to Play Content
Set and manage your how to play content for app.
- How to setup Web Version
- Install Node JS : Visit Node JS Official website : https://nodejs.dev/en/learn/how-to-install-nodejs/ for full installation guide.
- Where to set API URL (Admin)
- Go to Main Folder -> .env file open it
Base URL
(note:- do not change end of
/api/like set your admin panel url like thishttps://www.example.com/api/)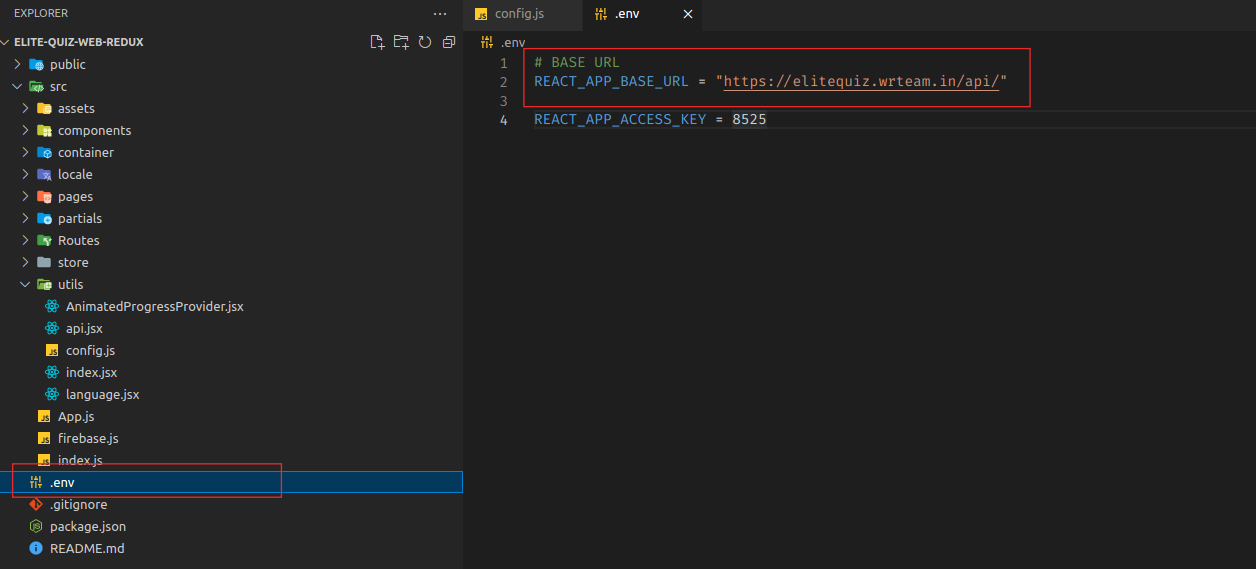
- How to run this project
-
Unzip the downloaded code. After unzipping you will have Elite Quiz - Web Code folder.
Open it in Visual Studio Code. -
Open VS Code teminal by typing CTRL+J in Windows/Linux, and for MacOS CMD+J and execute the command --> npm i
This will take some time to download a few Packages so wait for a few minutes. - After npm i finishes run this command --> npm start.
This Command will Start the development mode.Check If everything is working fine then your are good to go ahead. - How to configure firebase configuration and authorised domain add.
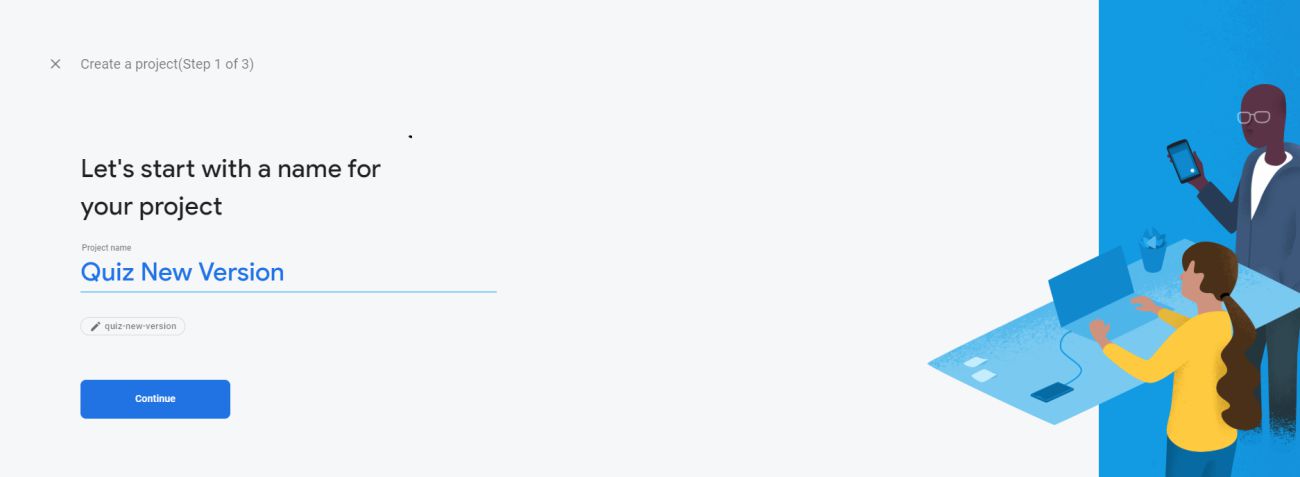
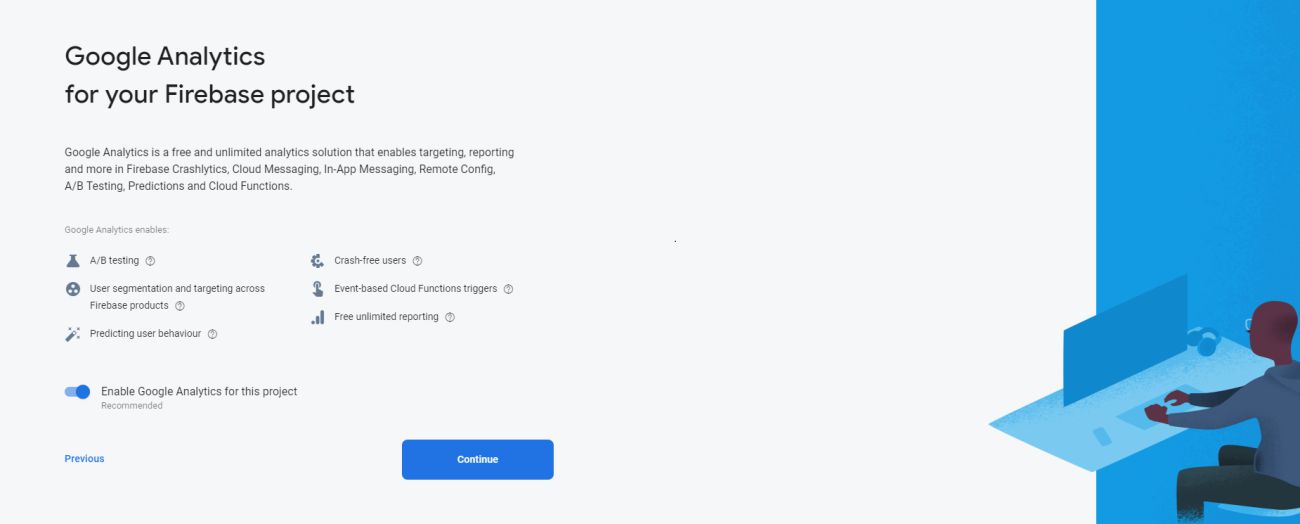
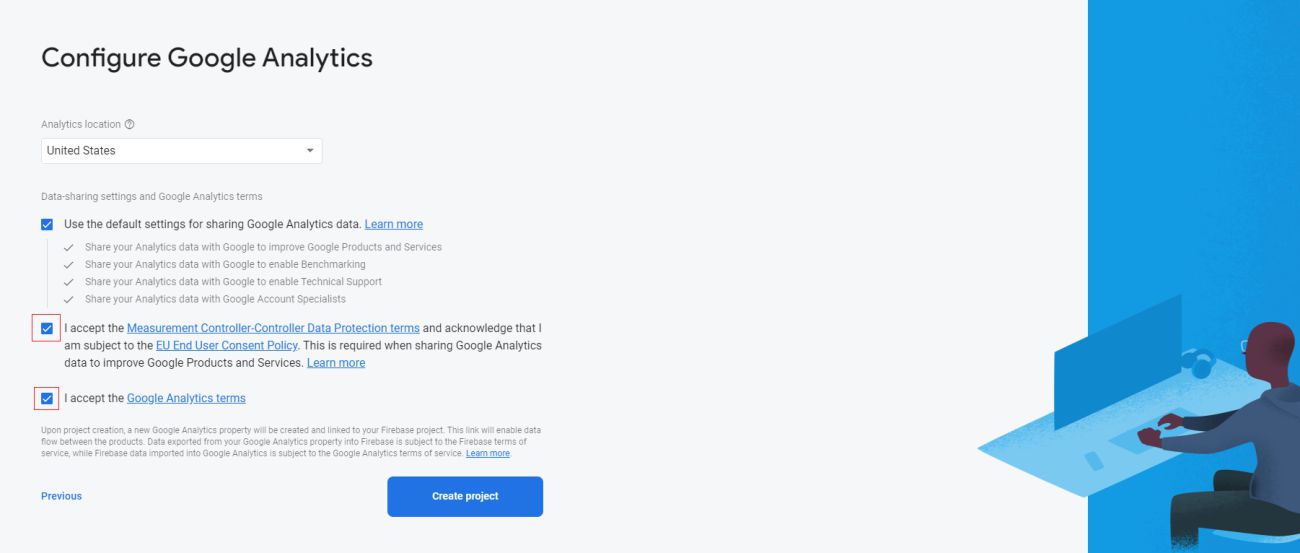
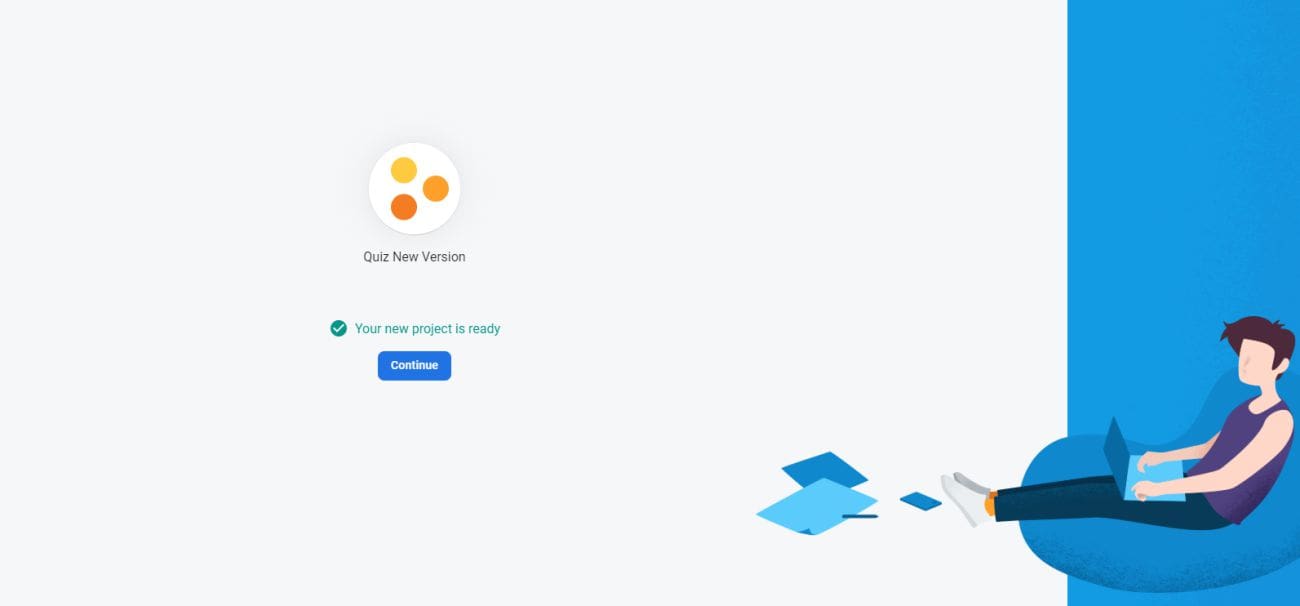
- Create firebase project in your account
- Add web application to your firebase project
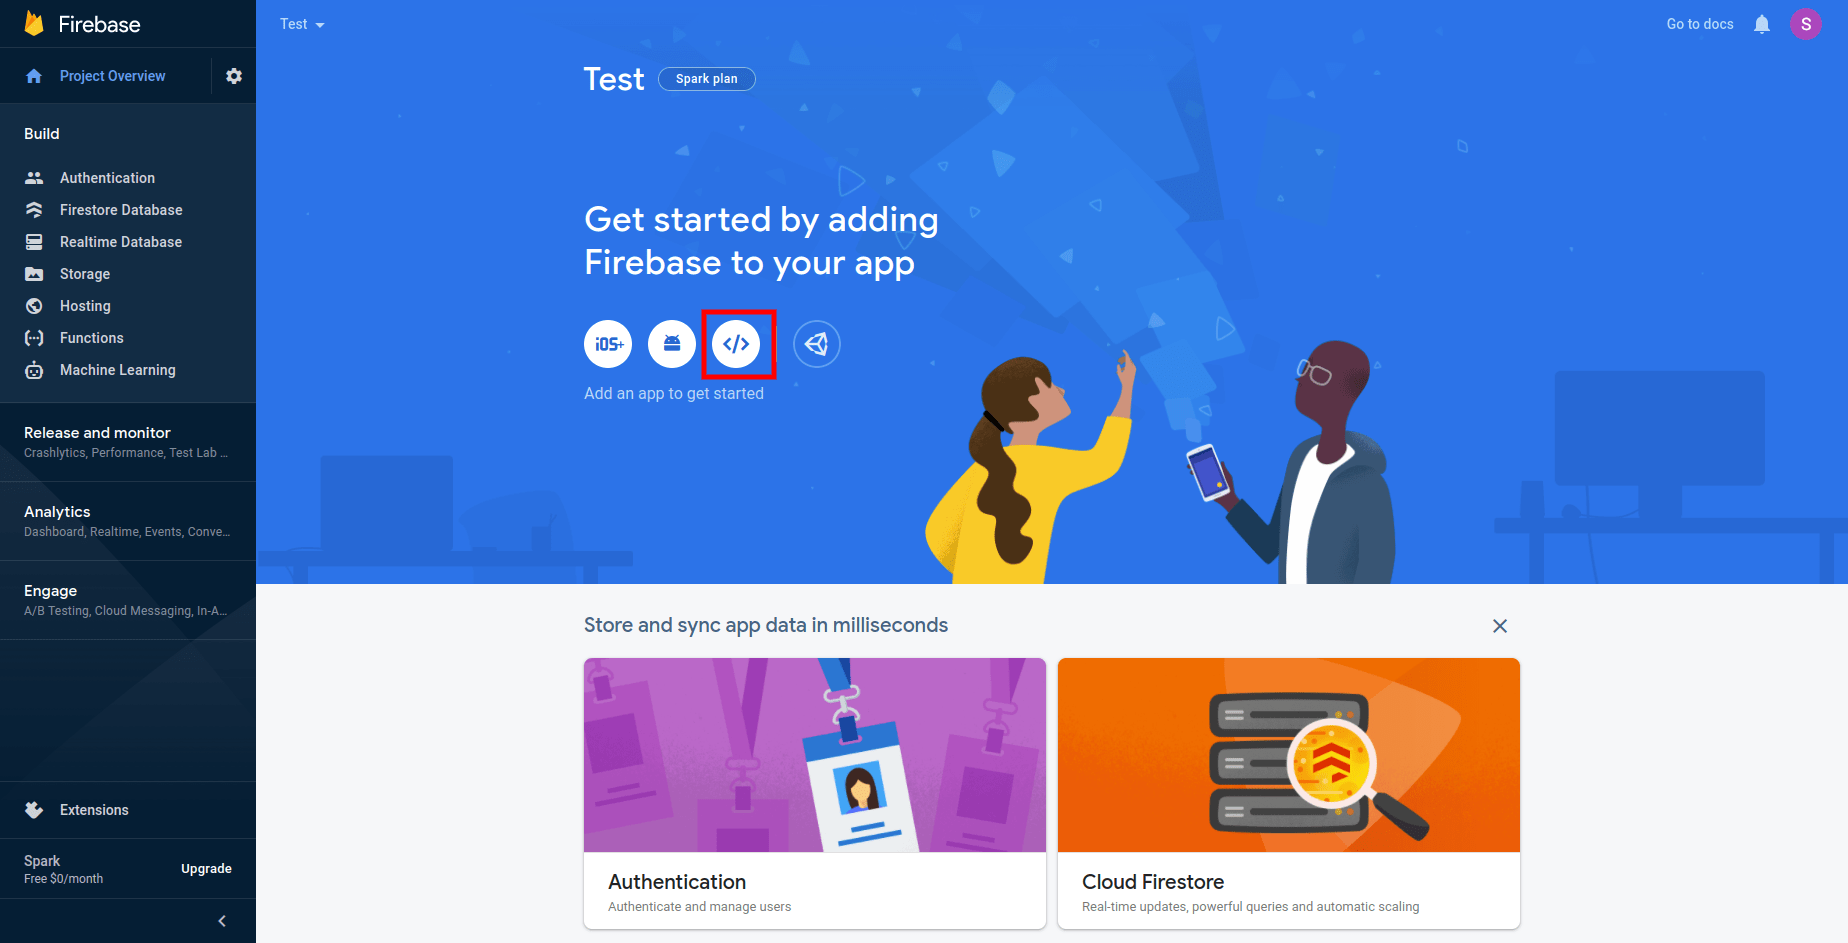
-
Enter the App Name and Click on Register App
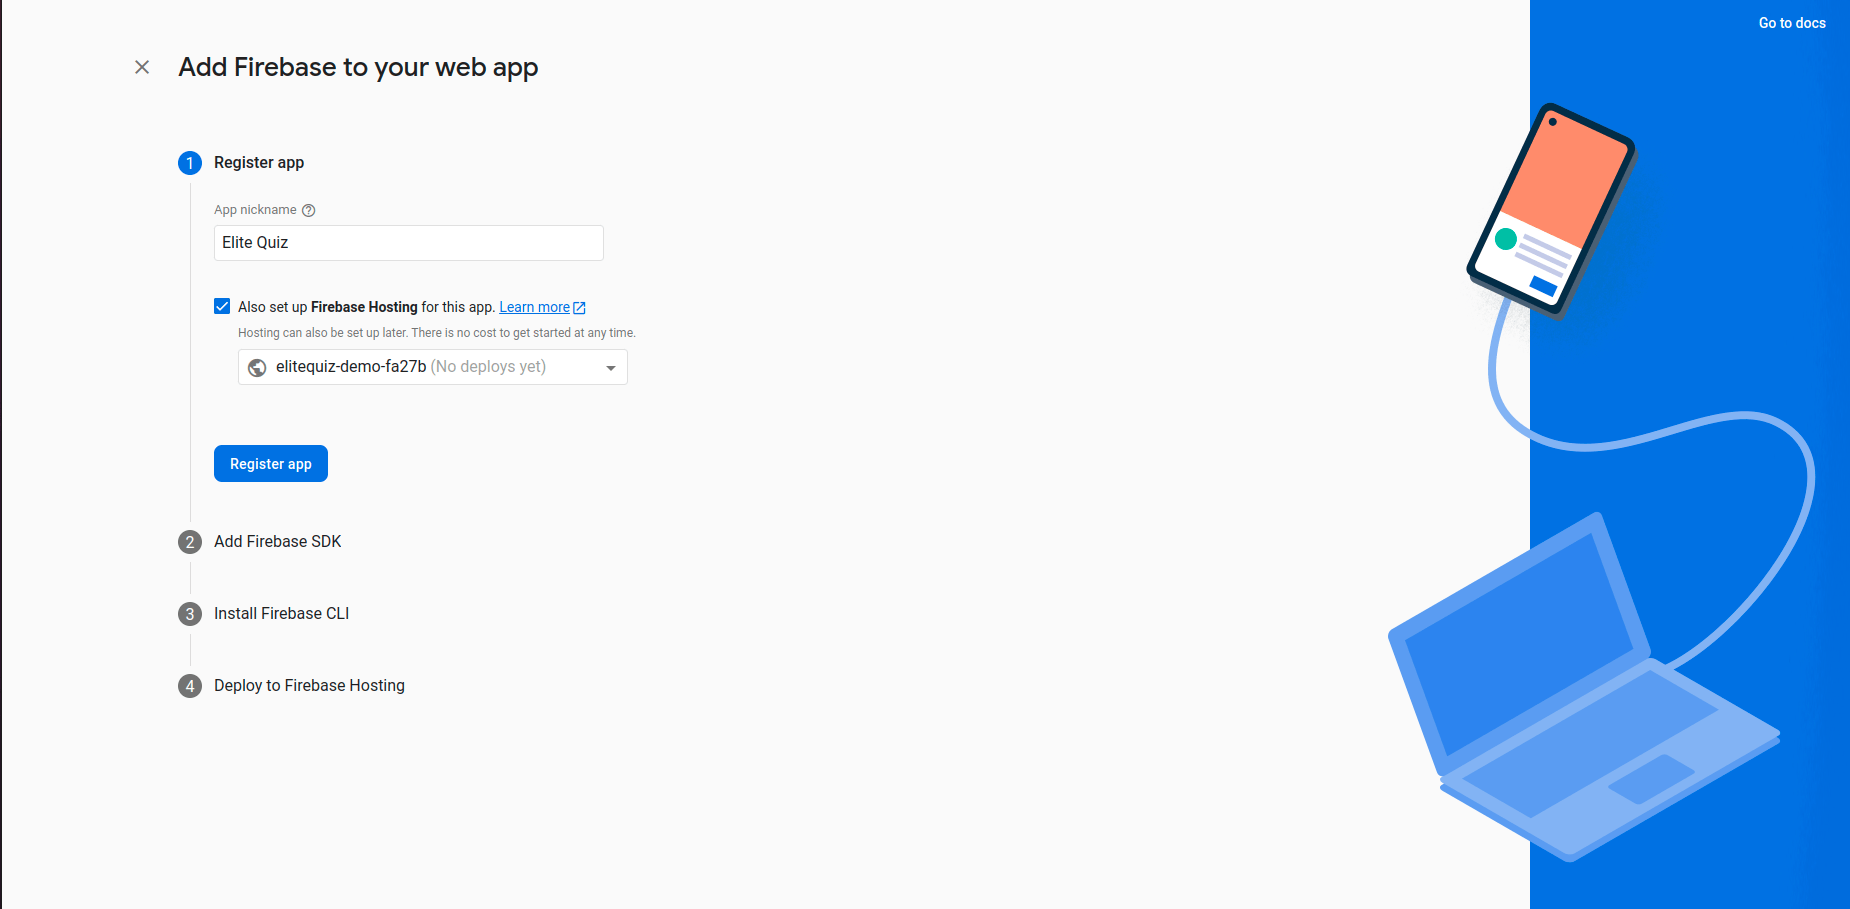
-
How to configure firebase integration and domain in firebase console.
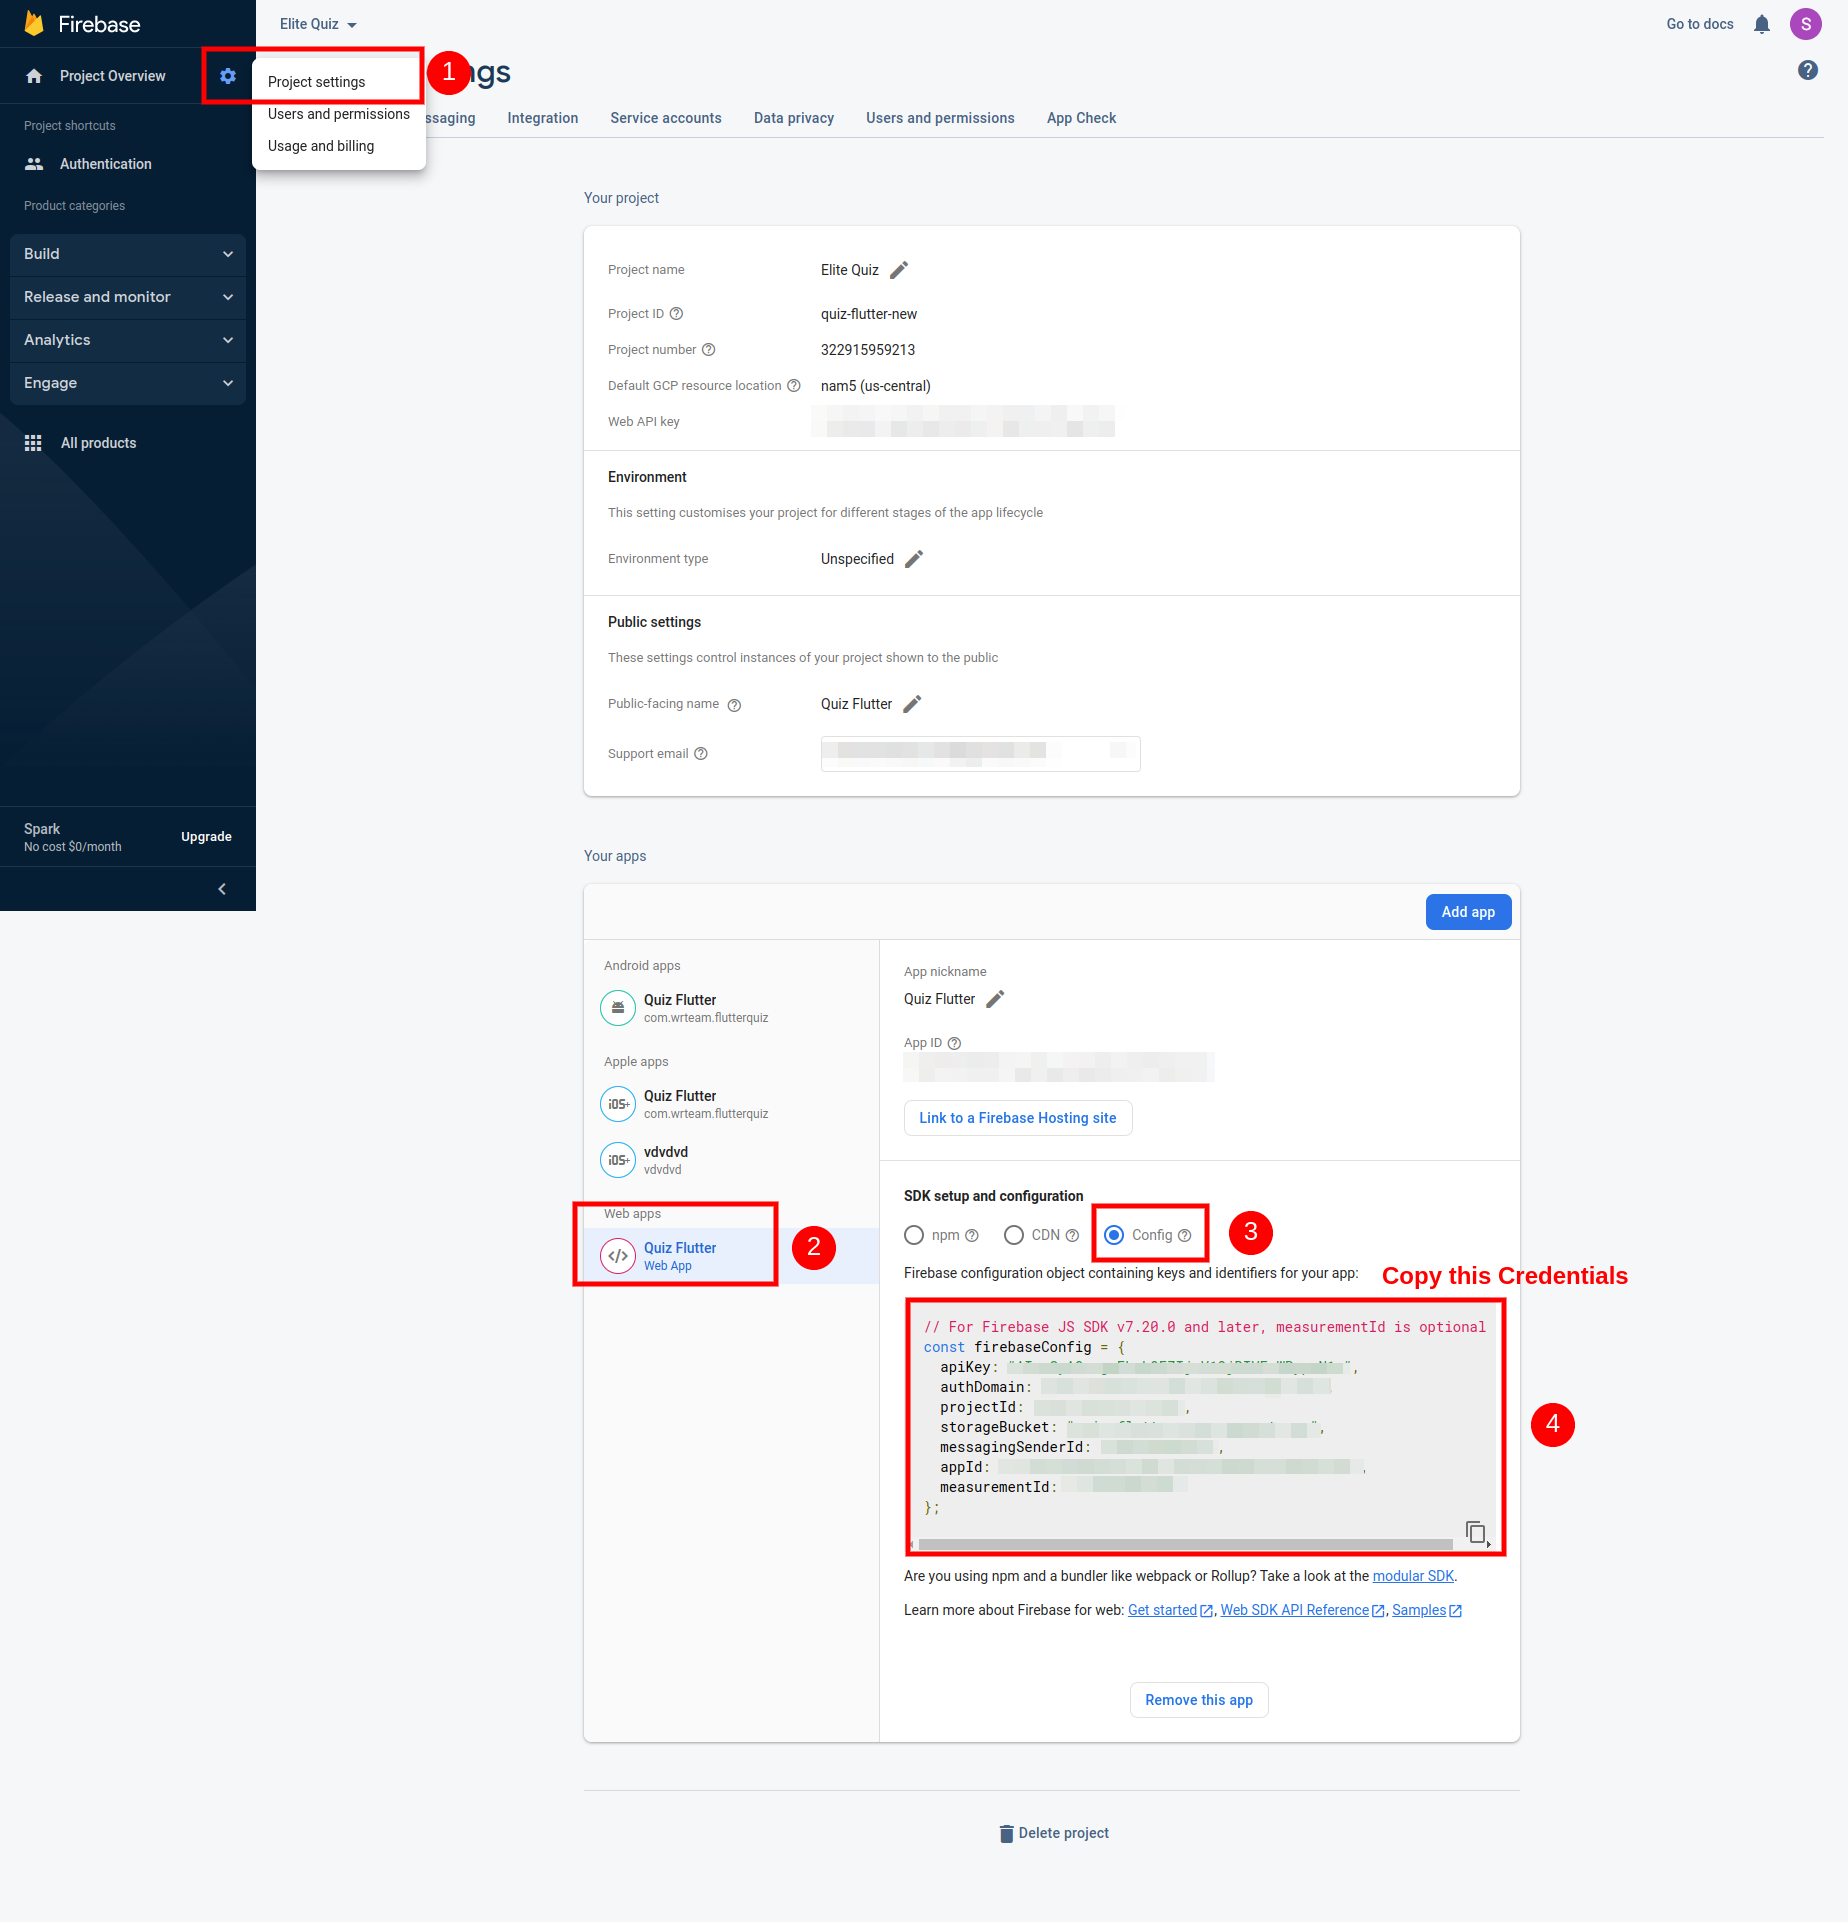
-
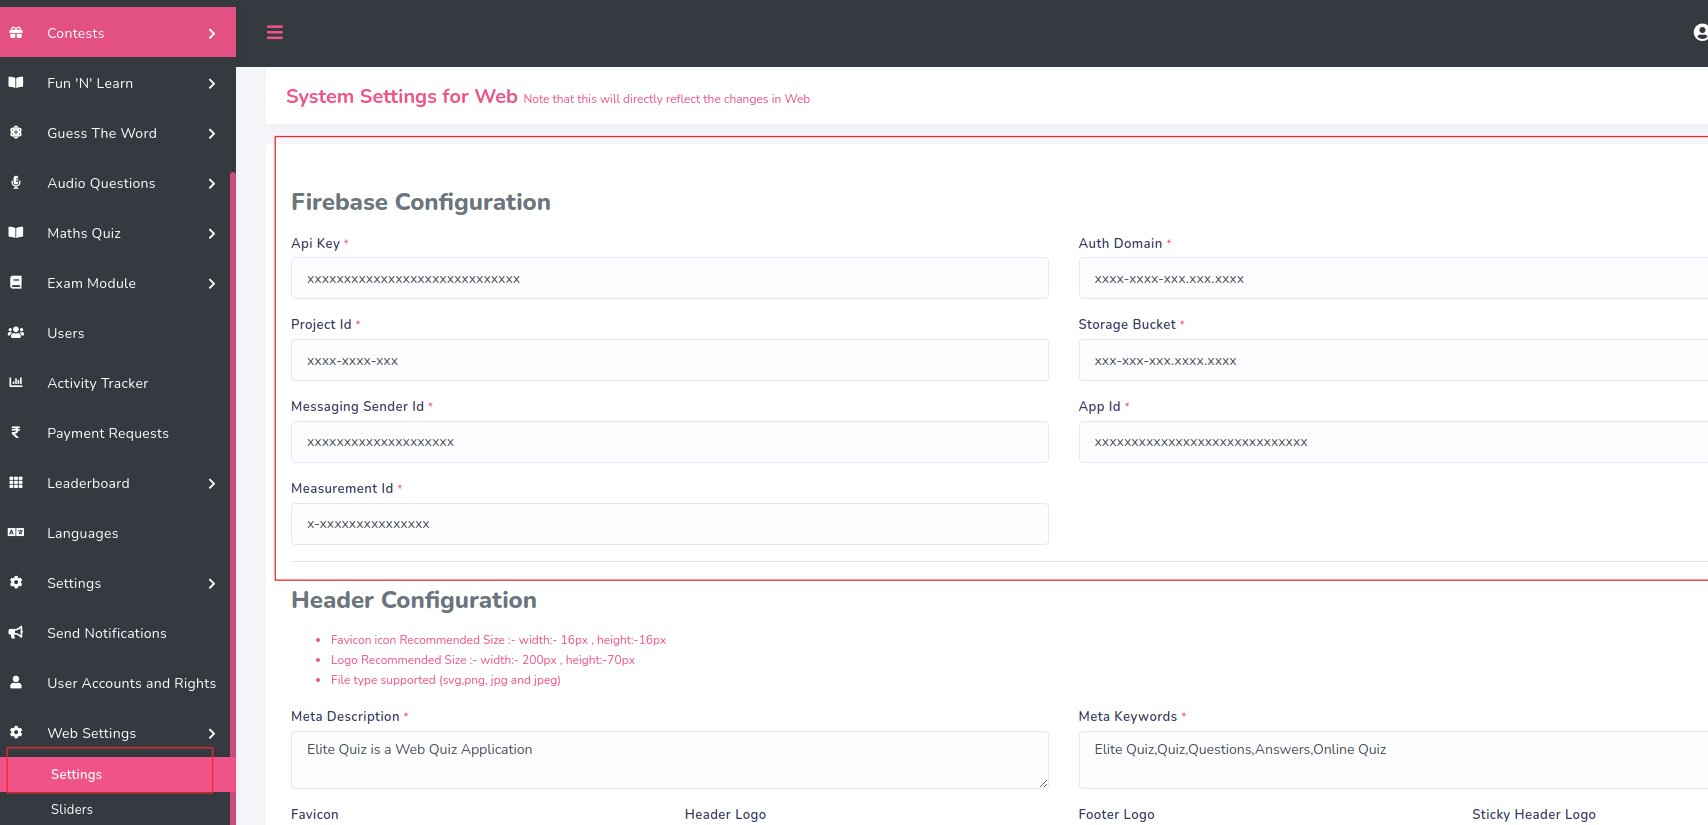
Copy this Highlited Code and paste one by one as per label given in admin panel->web settings->settings
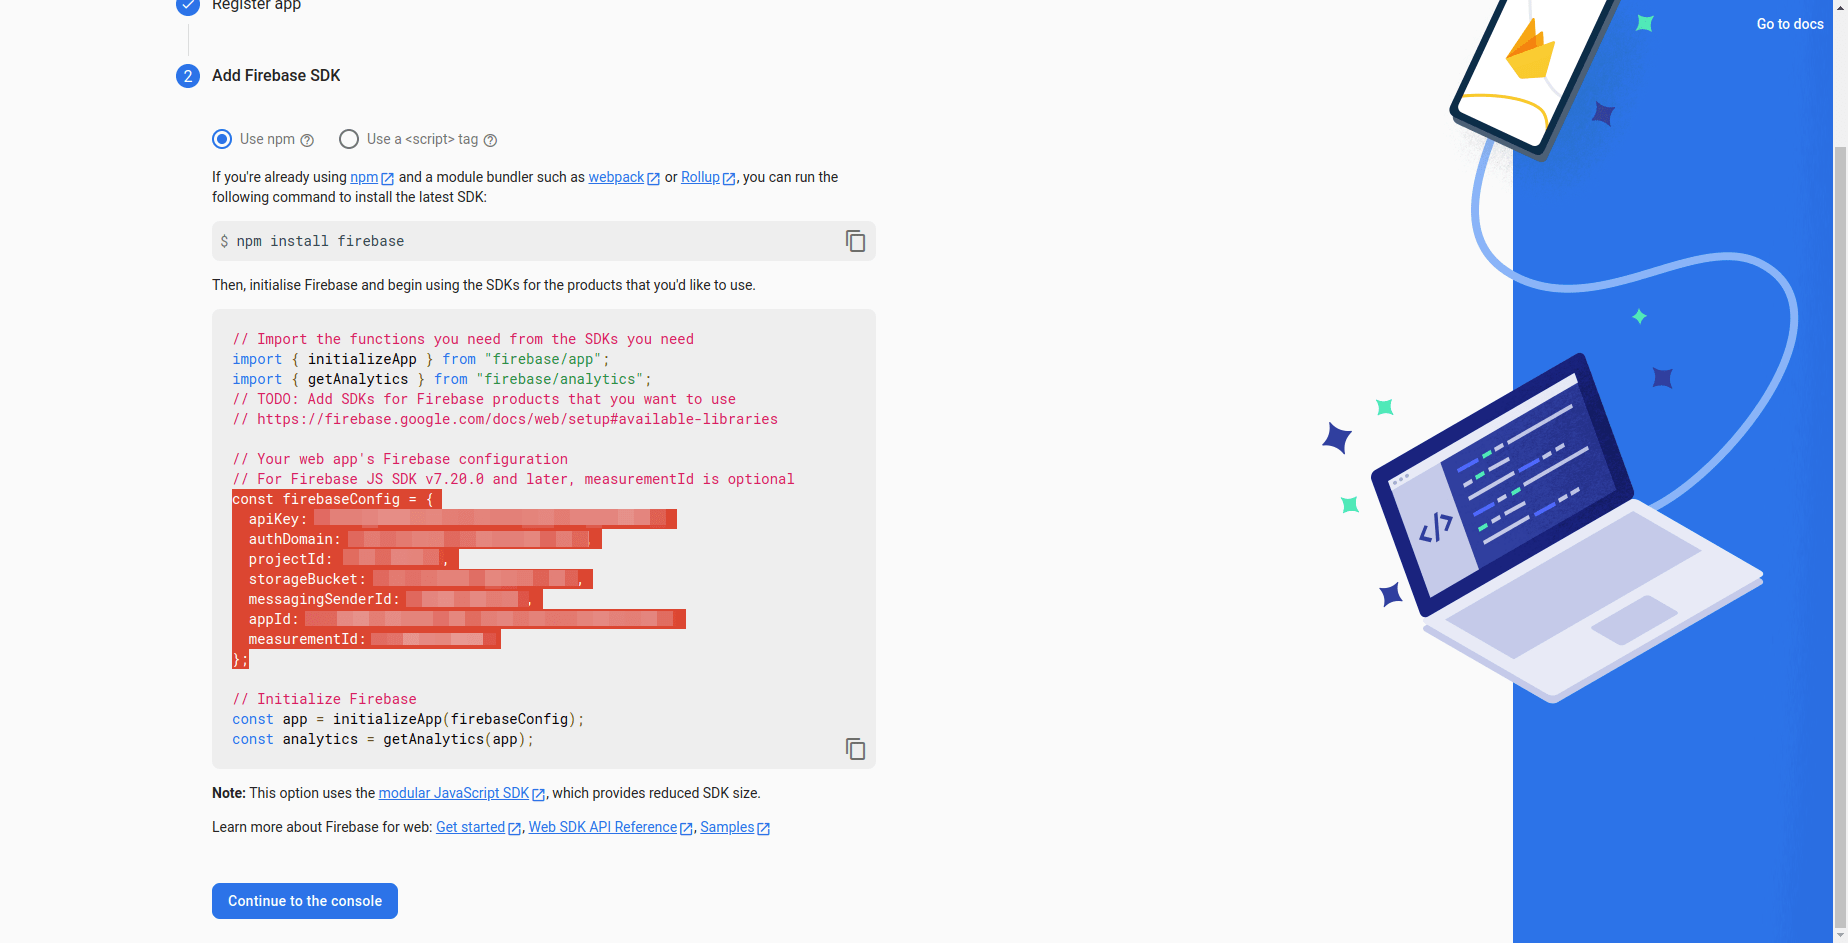
-
This credentials should match with the credentials that you have set in admin panel. Otherwise it will not work properly.
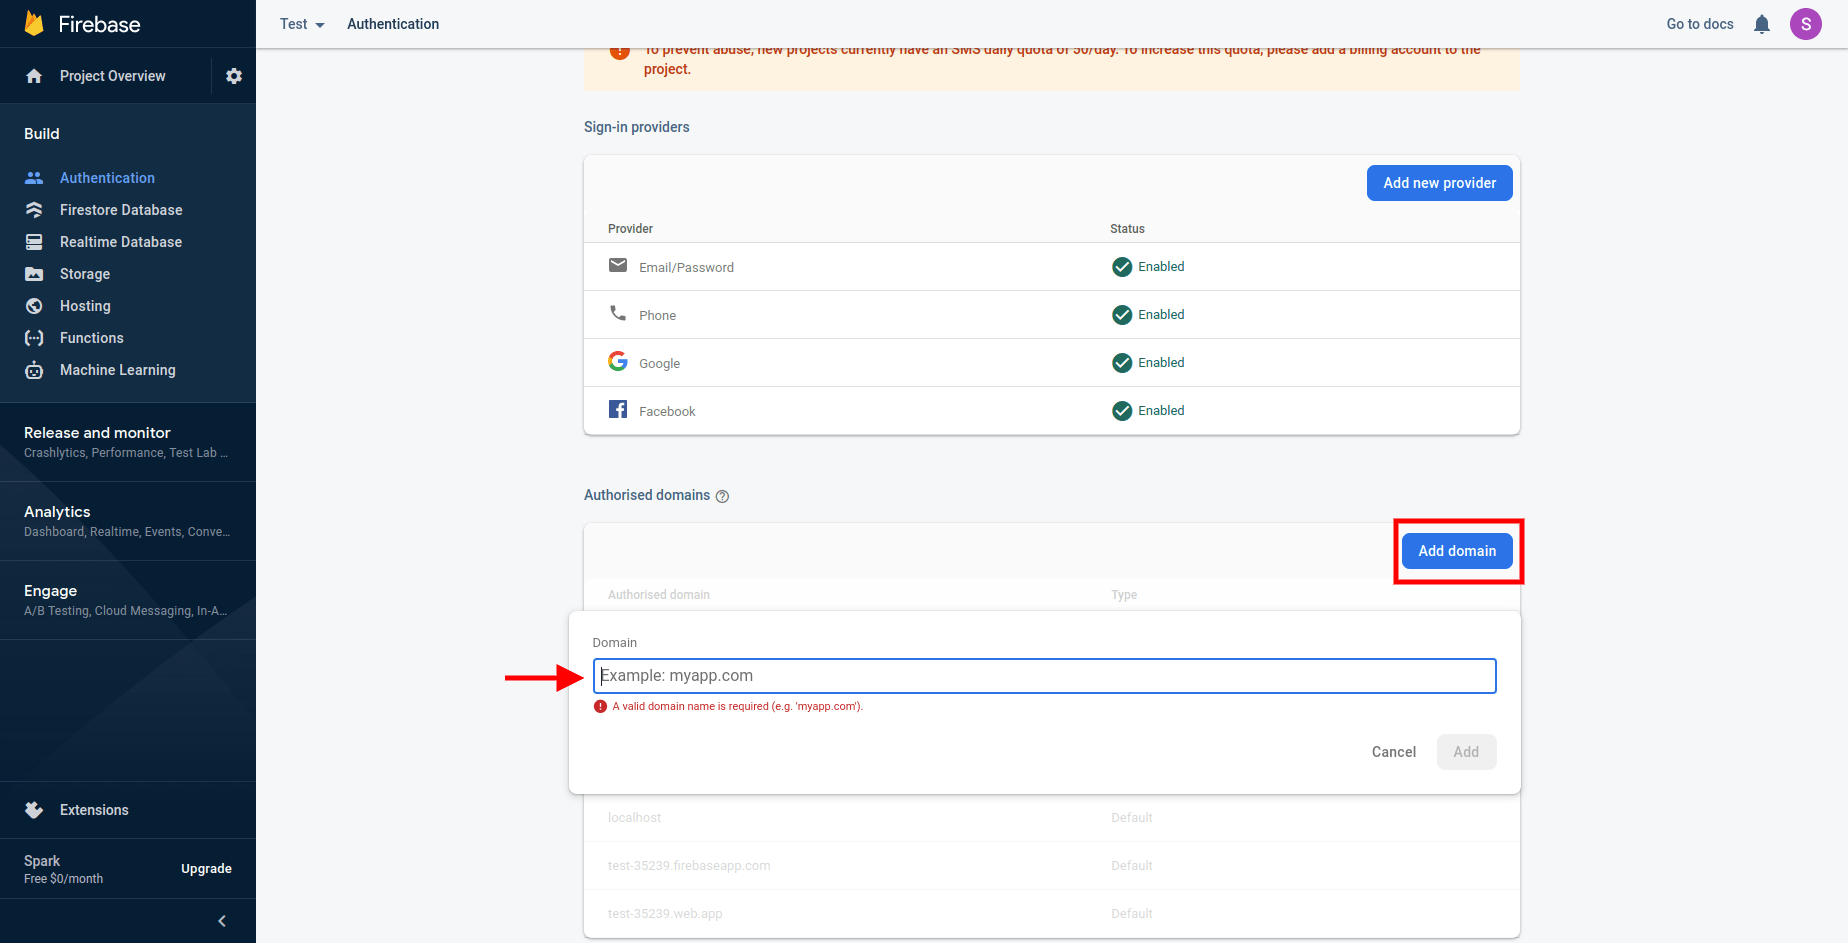
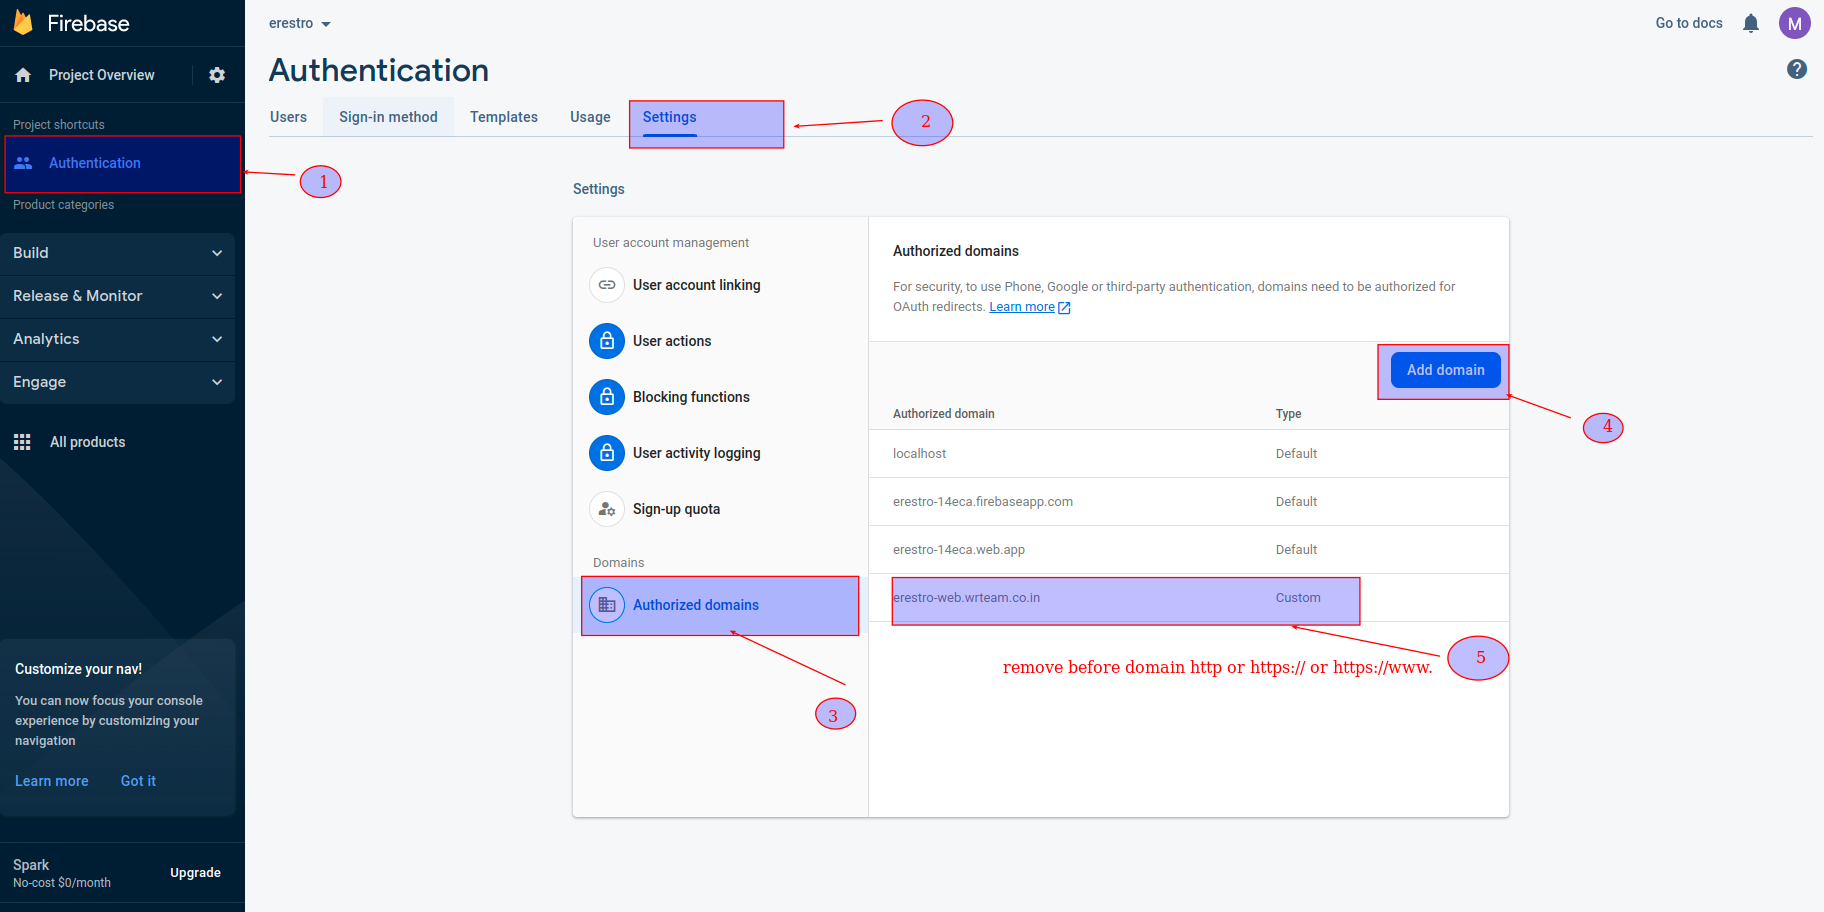
- How to configure domain in firebase console
- You have successfully connected your Web application to your firebase project.
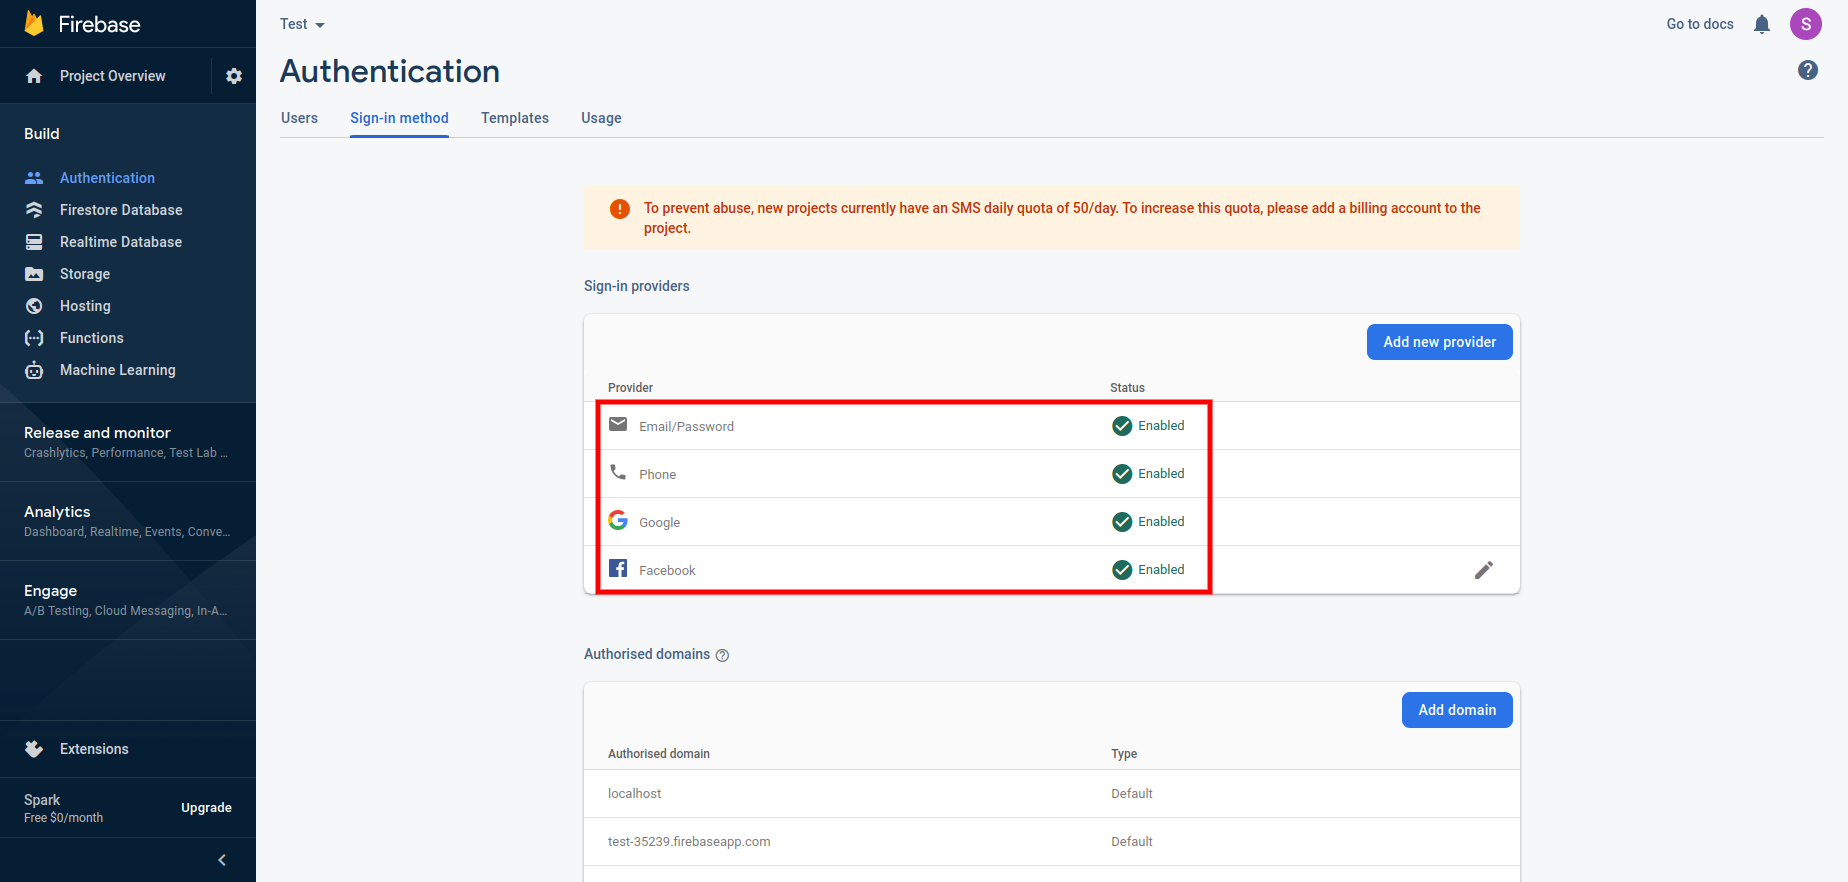
- How to enable firebase auth
- Go to firebase project.Click on authentication menu and goto sign-in method.
Enable all the authentication method mention in below image
- If your are using google sign-in you need to enable OAuth APIs that you want to use using https://console.developers.google.com/ .Enable people api and make sure you've filled out all required fields in the console for OAuth consent screen. Otherwise, you may encounter APIException errors.
- After that Add your domain name without https:// OR http:// e.g elitequiz.wrteam.in
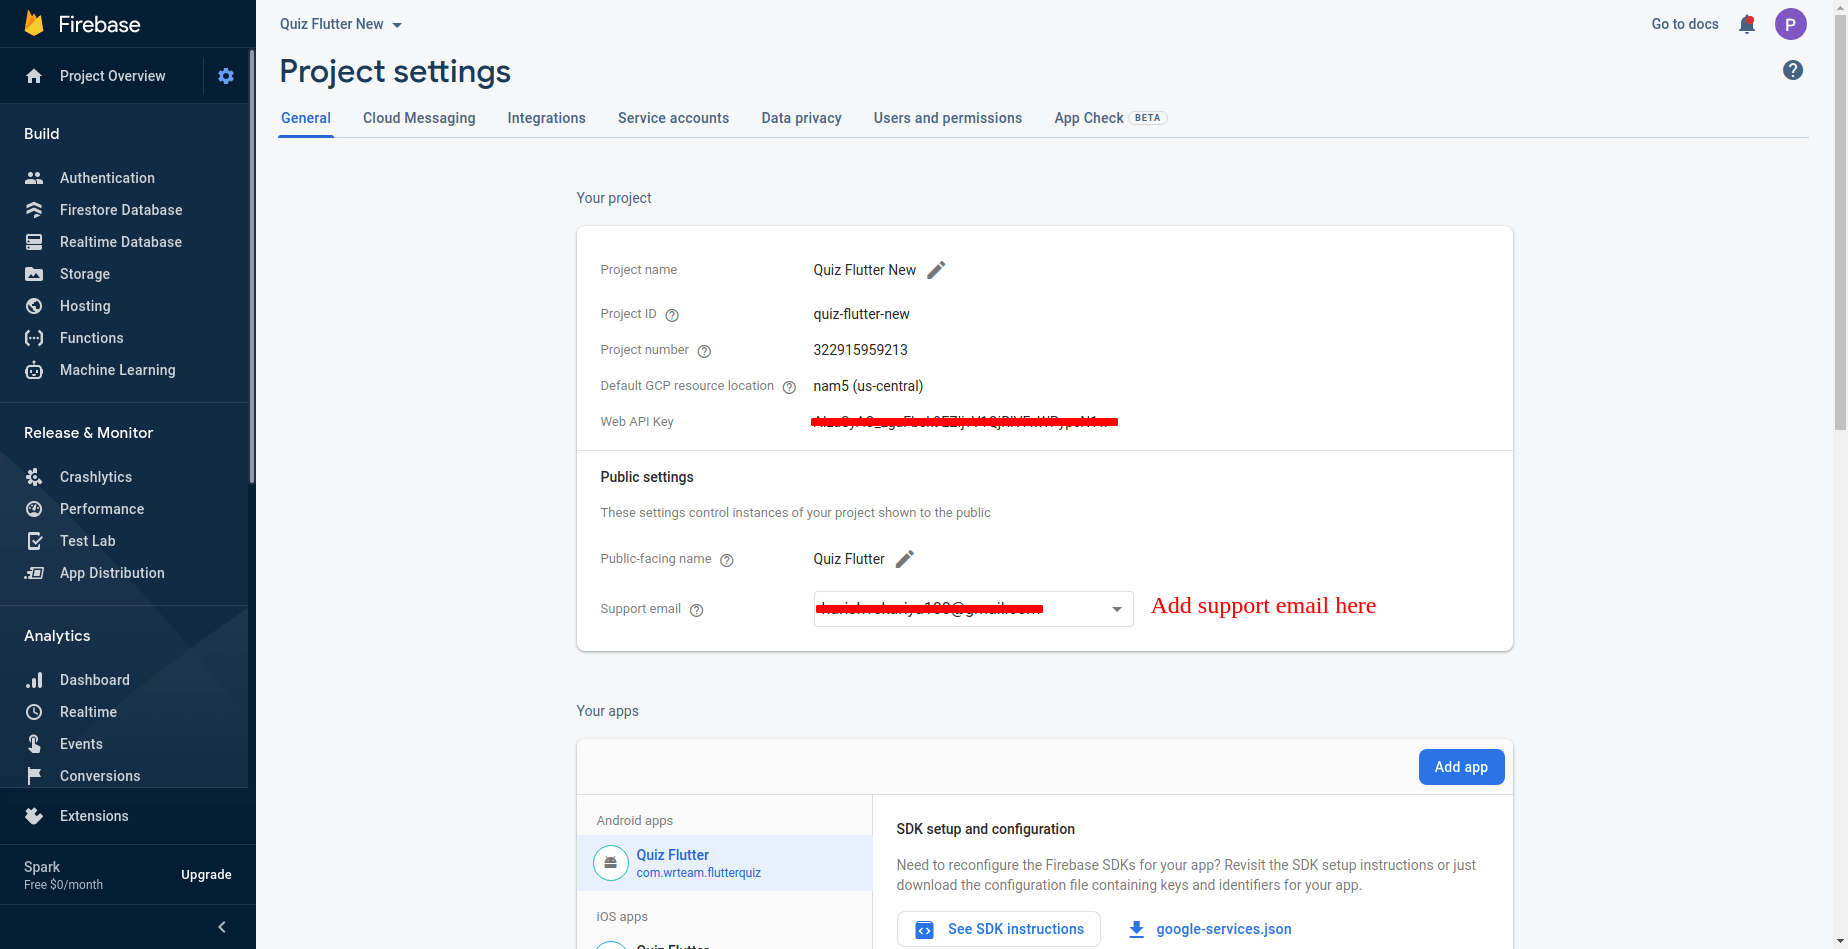
- Please add support email as shown in below image. Go to project settings -> general -> public settings
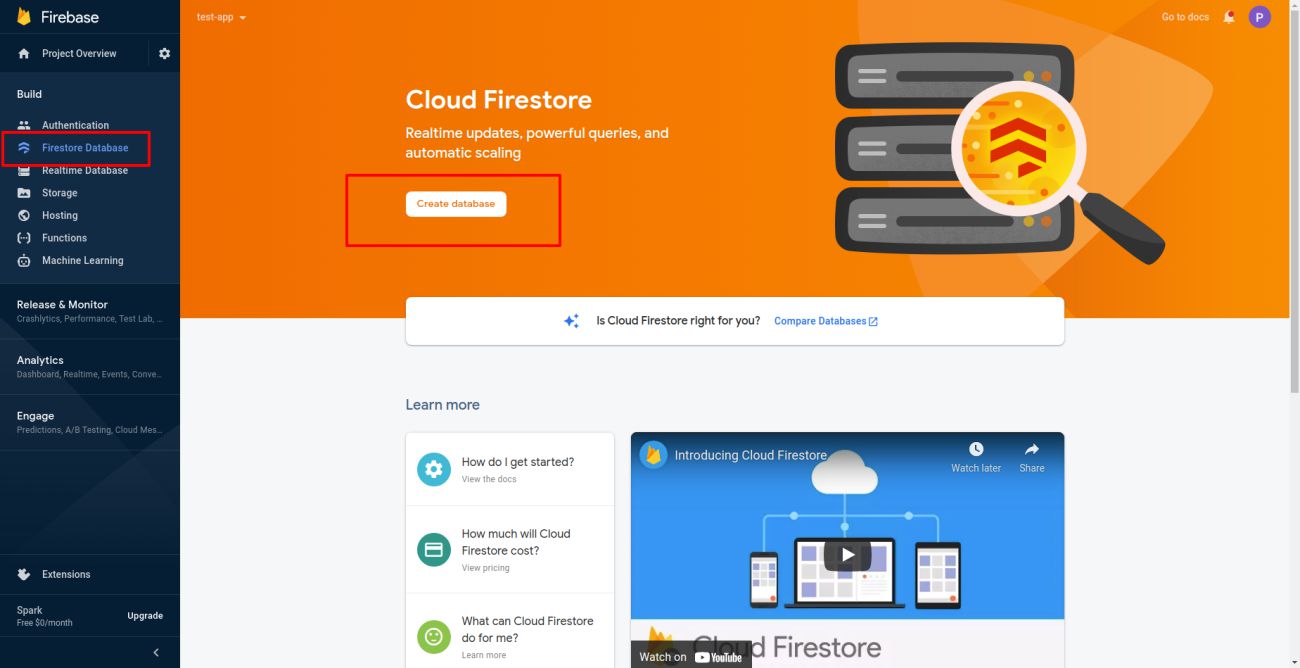
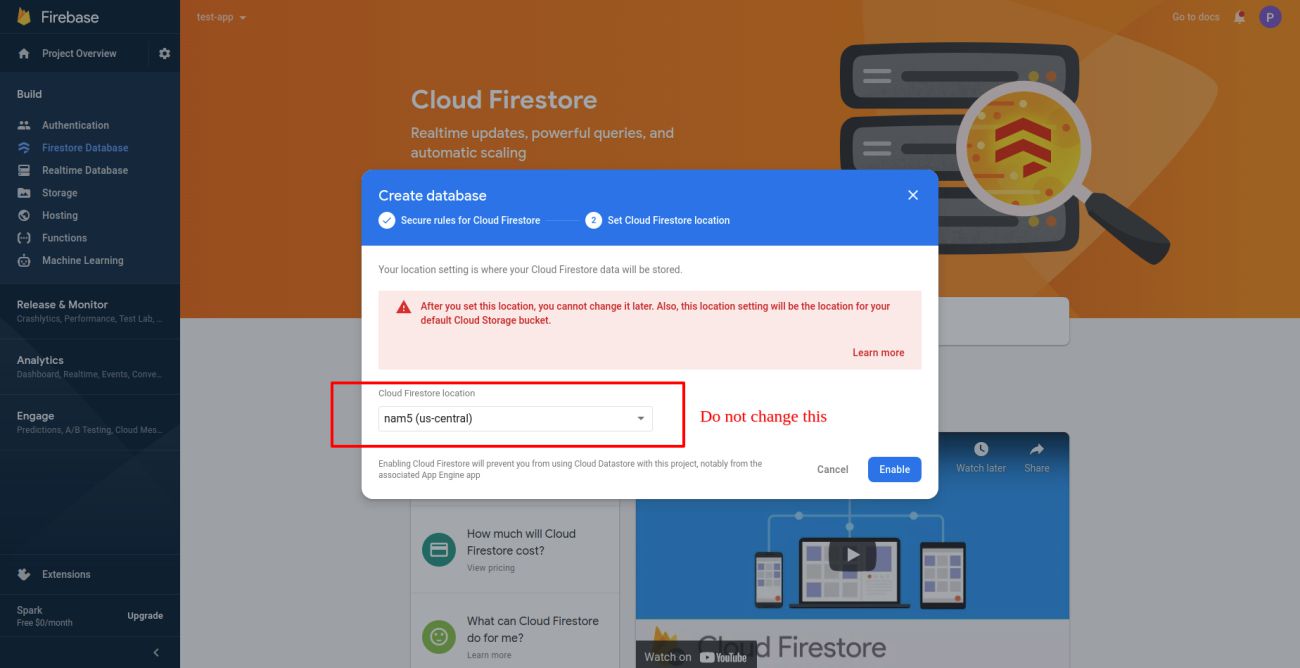
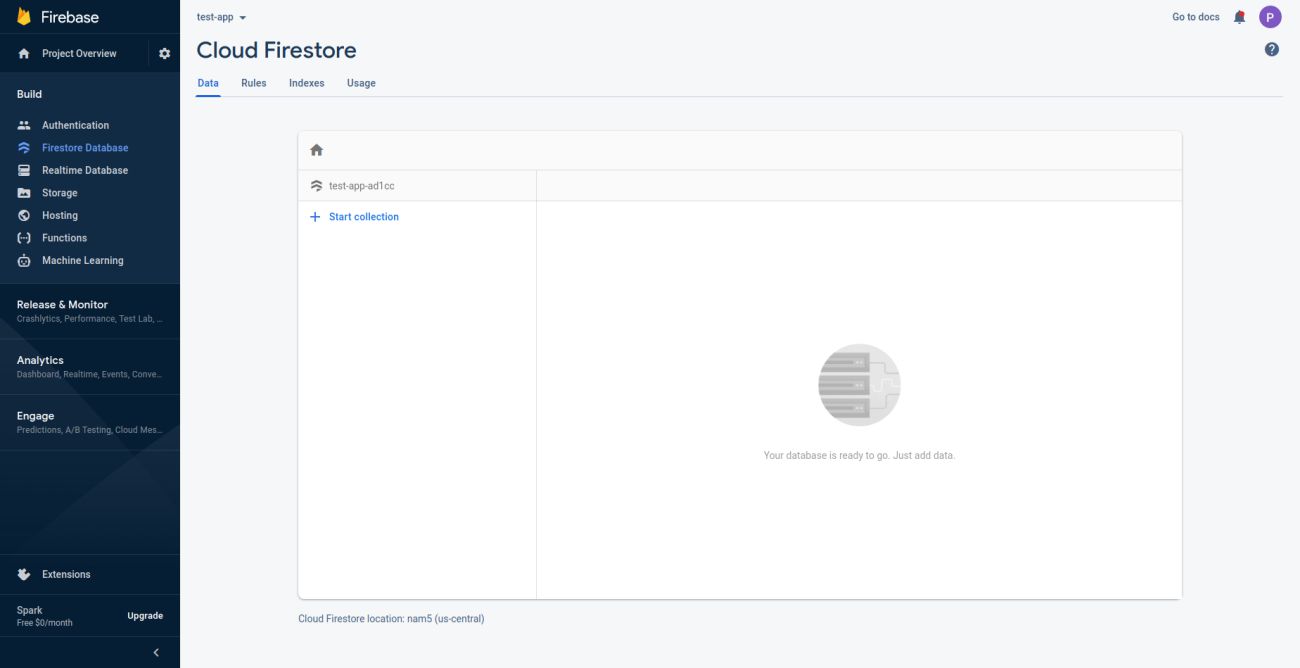
- How to enable cloud firestore
- Follow this steps in order to add cloud firestore
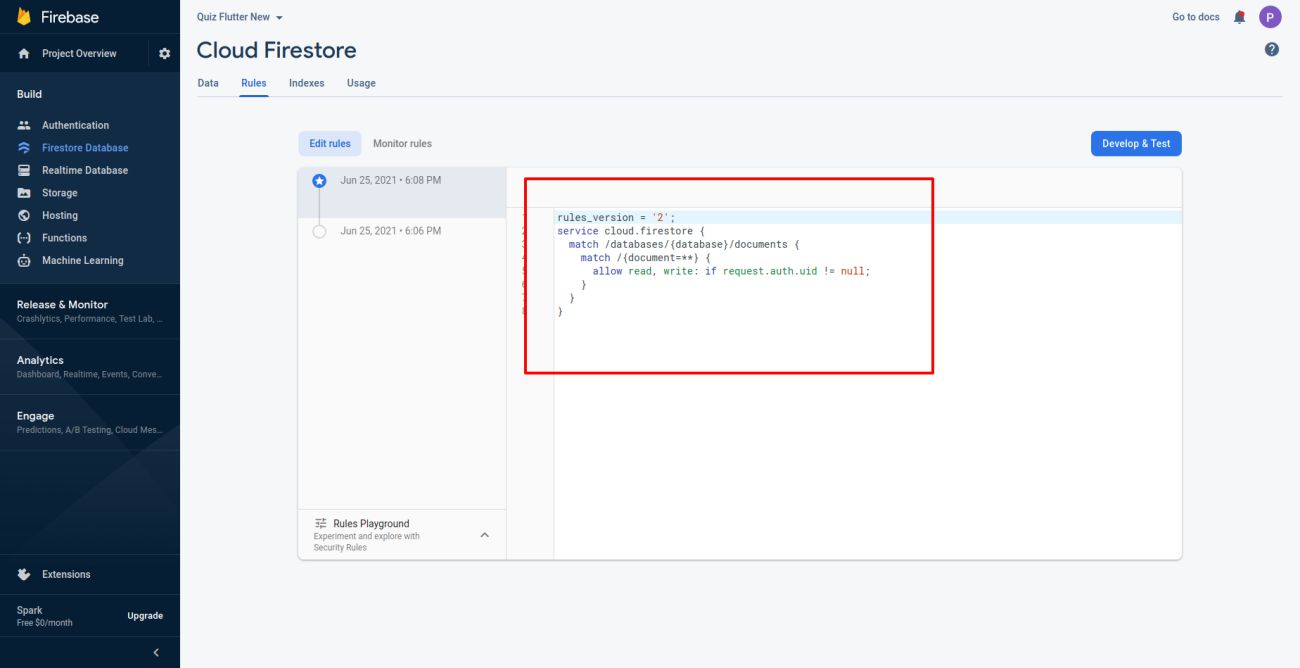
- Change security rules of cloud firestore in order to make your web more secure
- How to change Web Application name
- Change application name for your Web application. Go to
Admin Panel > Profile and change the value of appName
- How to change logo, favicon, Firebase, footer data, quizplay images etc
- Go to Admin Panel -> Web Settings -> Settings.

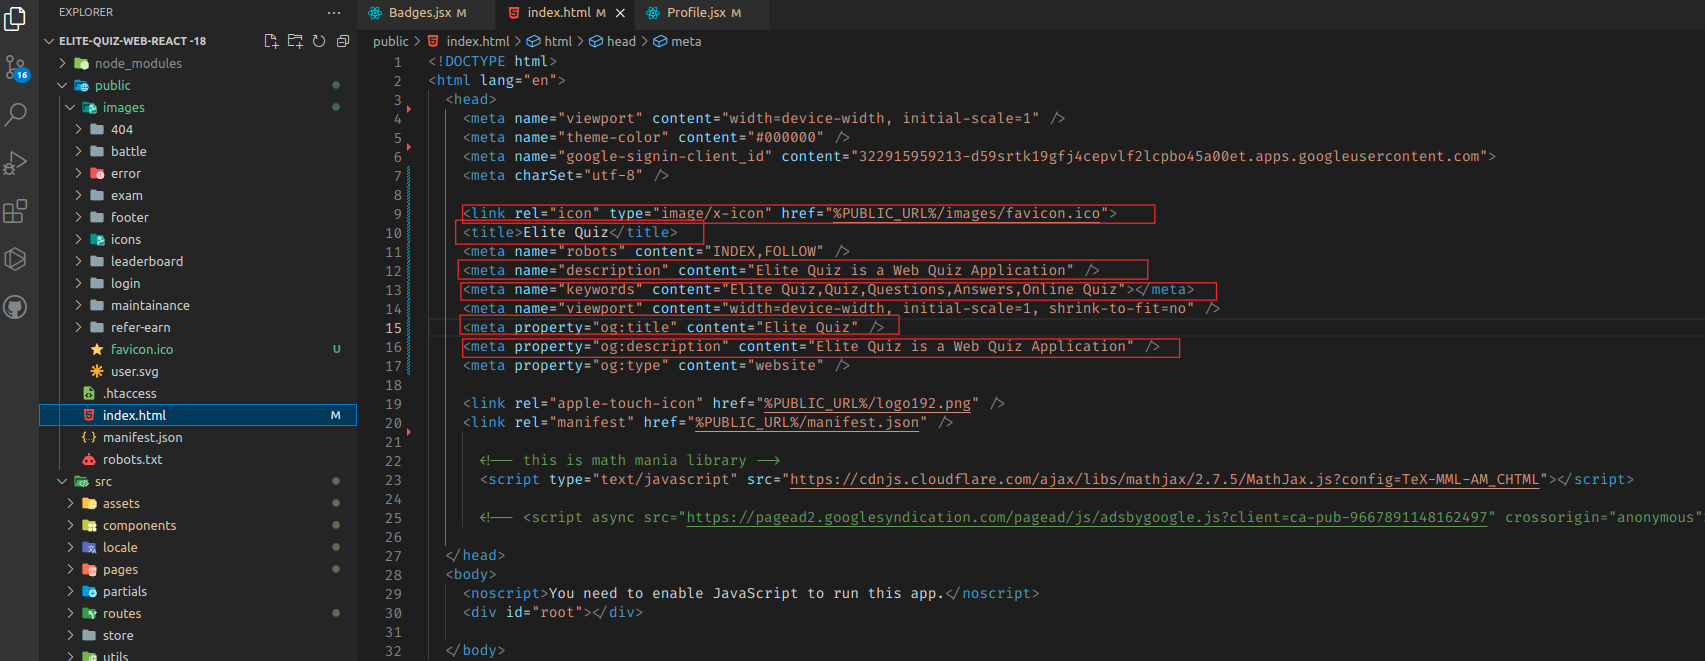
- Go to public -> index.html (Note:- make sure check whatever you set favicon in admin panel set here same with .png,.svg etc)
- How to set default language
-
By default applicaiton language is English. If you want to change
default language
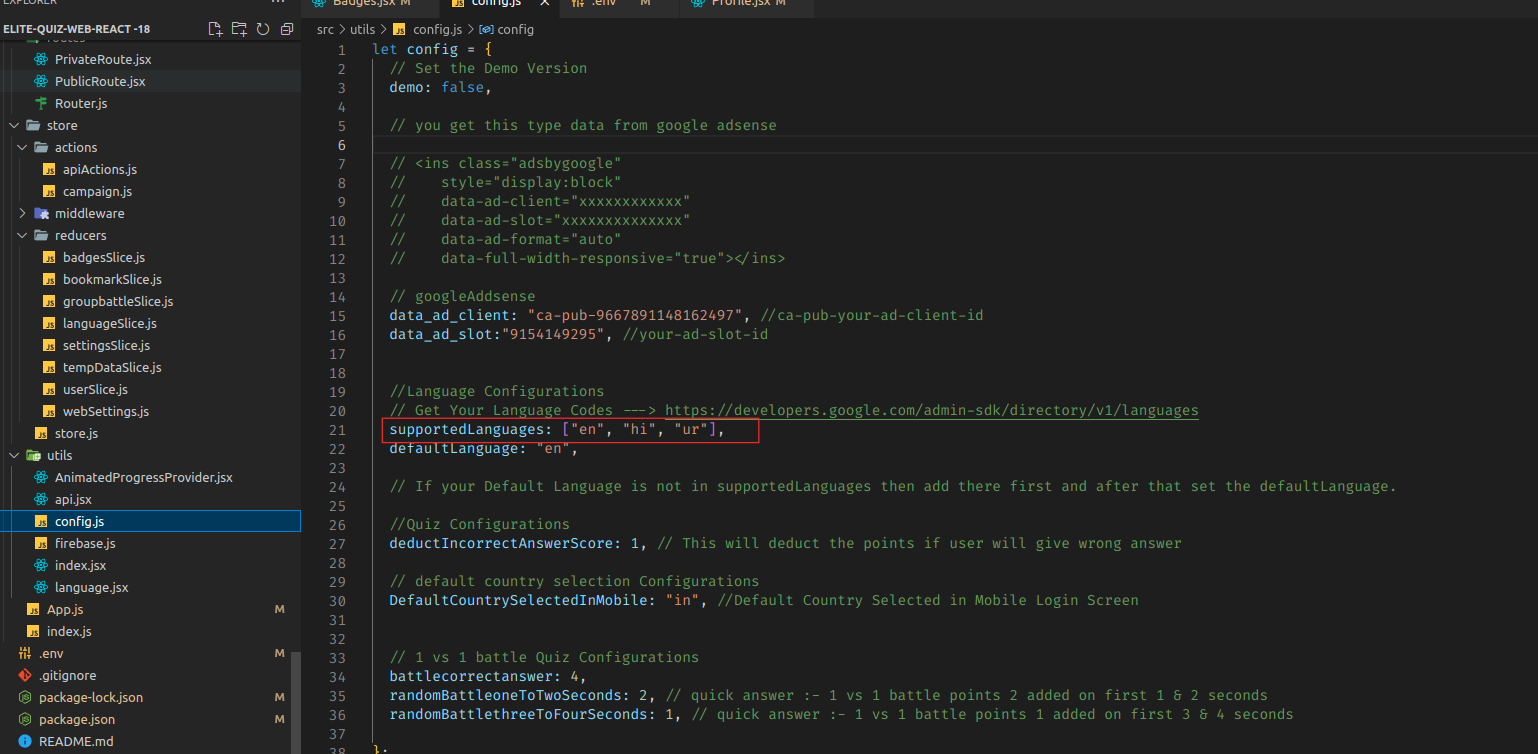
go to YOUR_APP_FOLDER > src > utils > config.js and add your respective language's code shown in
below image.
Get your language code from here
https://developers.google.com/admin-sdk/directory/v1/languages.
Make sure your language code is avaialble in https://developers.google.com/admin-sdk/directory/v1/languages.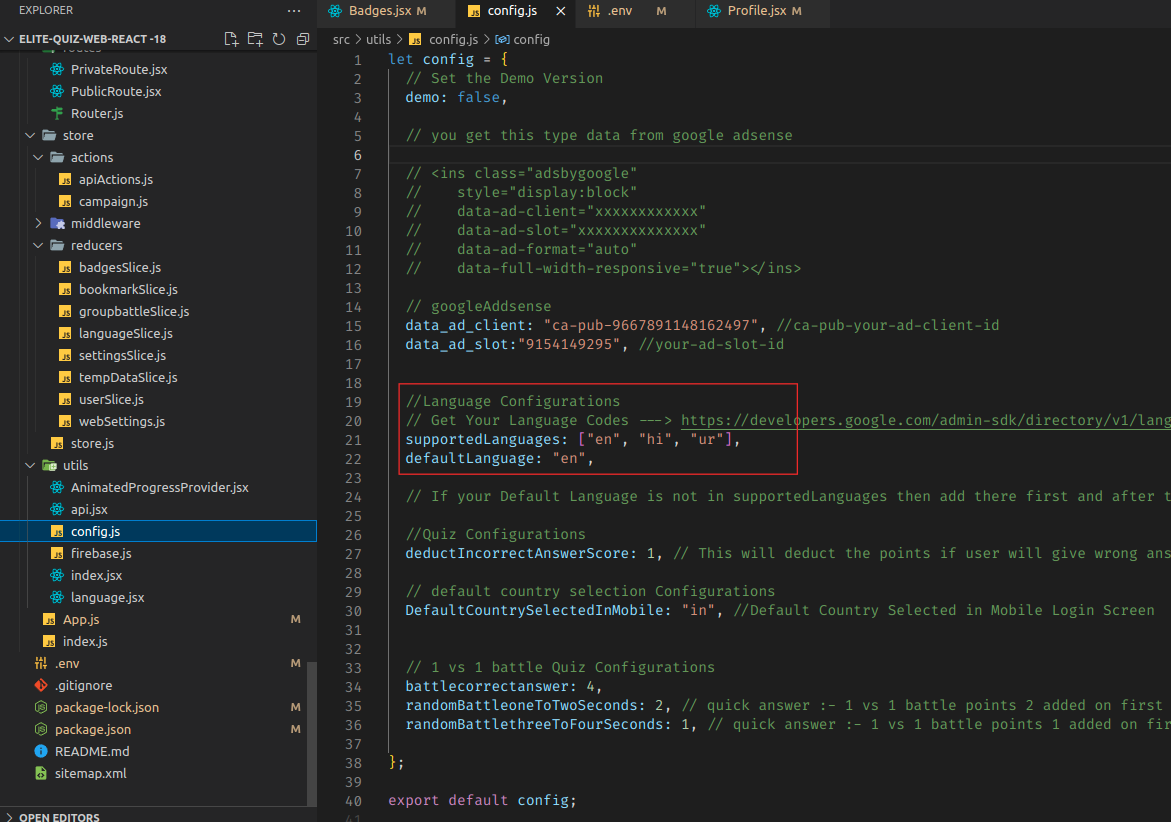
-
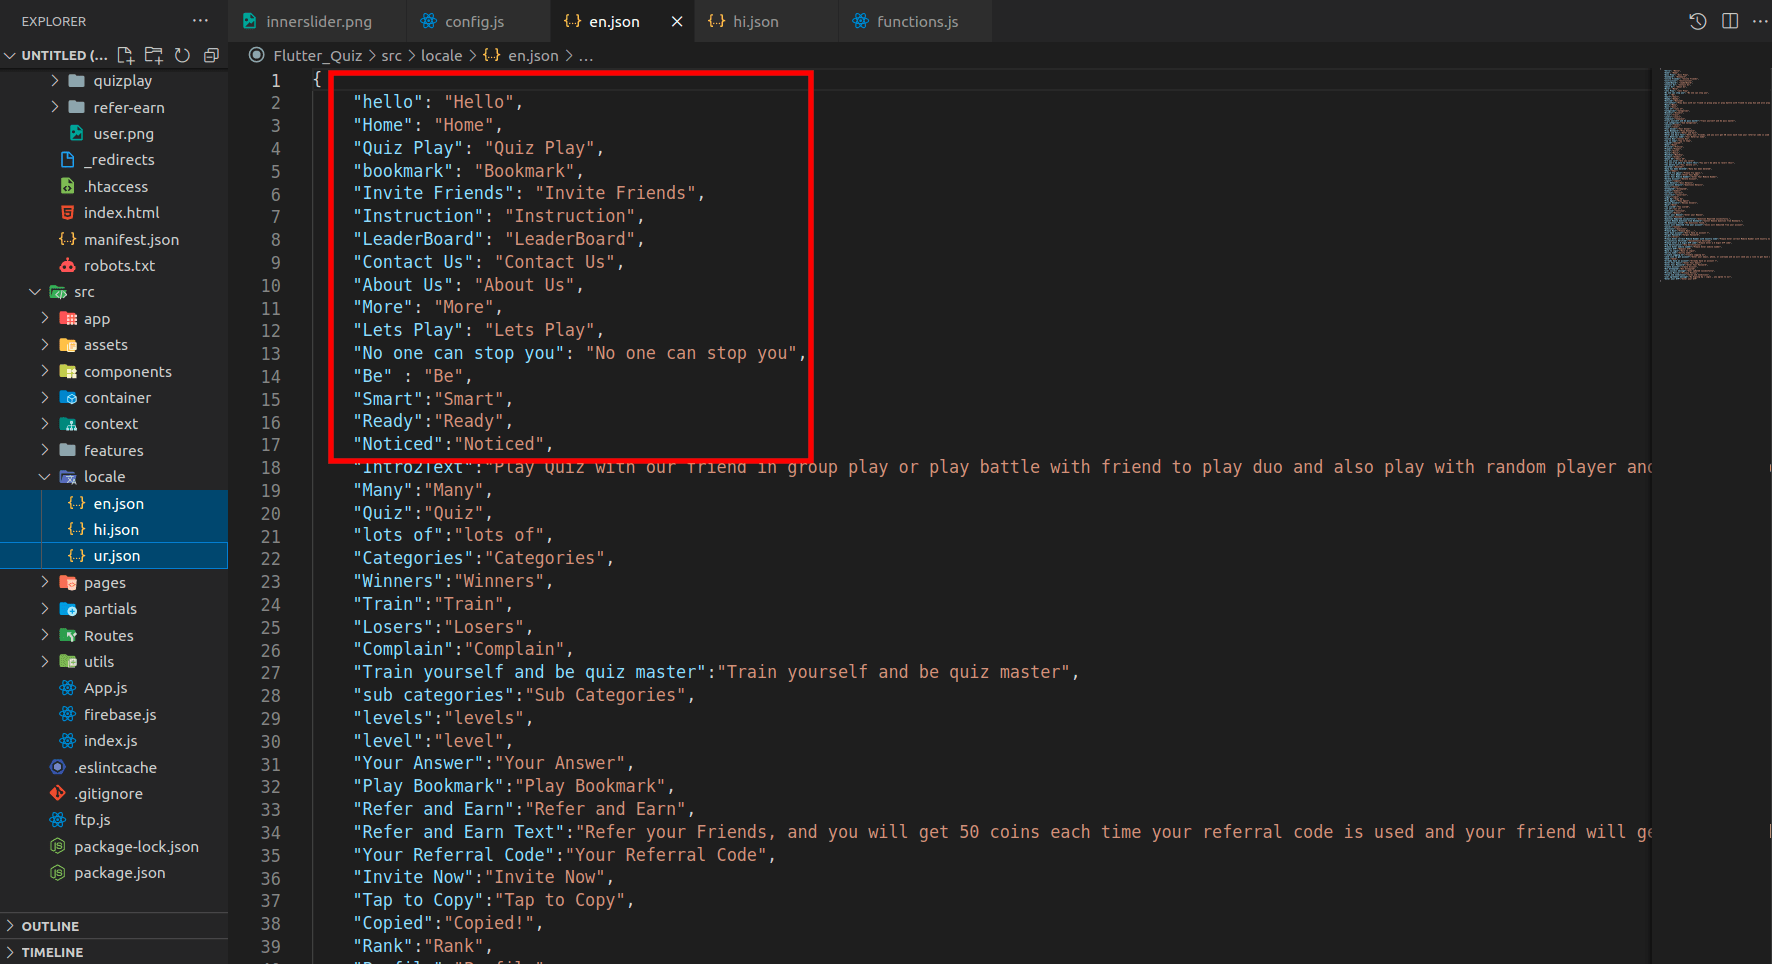
If your default language is not in src/locale/[language-code].json then
create new file
in same folder with [language-code].json. Add all the labels from en.json and
convert label values in your respective language

-
copy all the labels form en.json file in your [language-code].json file.
- How to add new language
-
Go to your admin panel and enable language mode as shown in below image
-
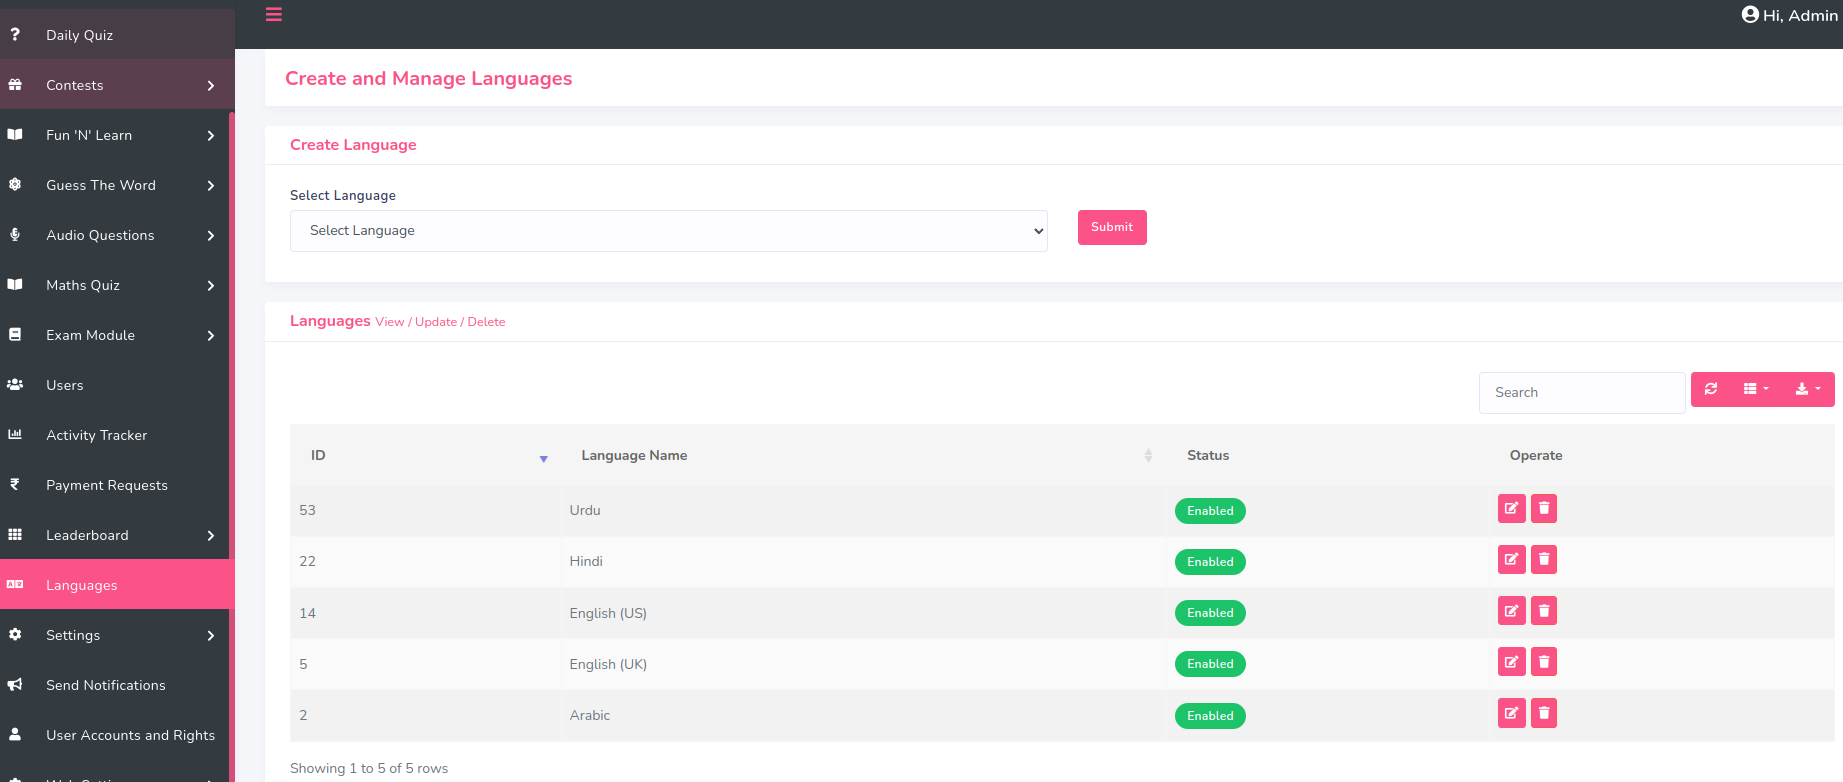
Go to your admin panel and add new language as shown in below image
-
Add newly added language code in list as shown in below image. Go to
src > utils > config.js
Get your language code from here
https://developers.google.com/admin-sdk/directory/v1/languages.
Make sure your language code is avaialble in
https://developers.google.com/admin-sdk/directory/v1/languages.
-
Create new file
in assets/languages/ with [language-code].json. Add all the labels from en.json
and
convert label values in your respective language
-
copy all the labels form en.json file in your [language-code].json file.
- How to change application colors
-
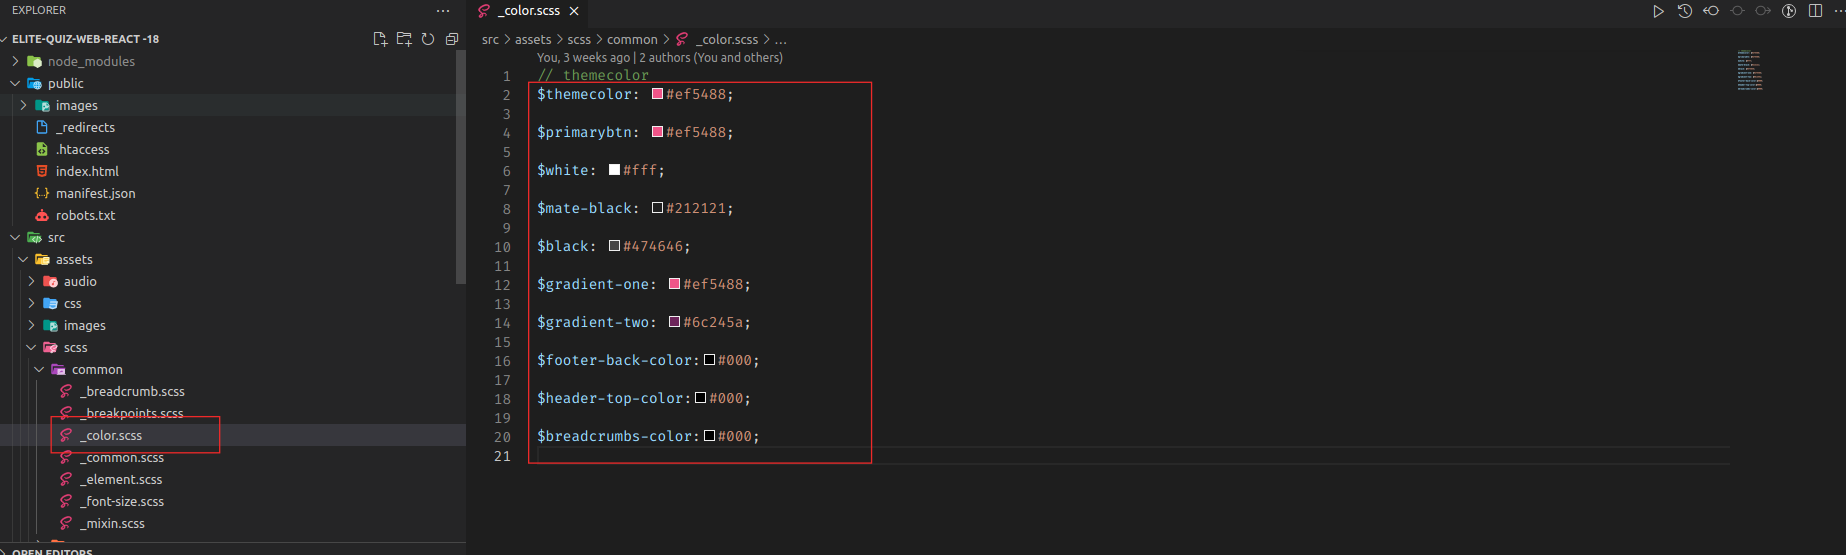
Add your colors in YOUR_APP_FOLDER/src/assets/scss/common/_color.scss and do not change the color
variables name
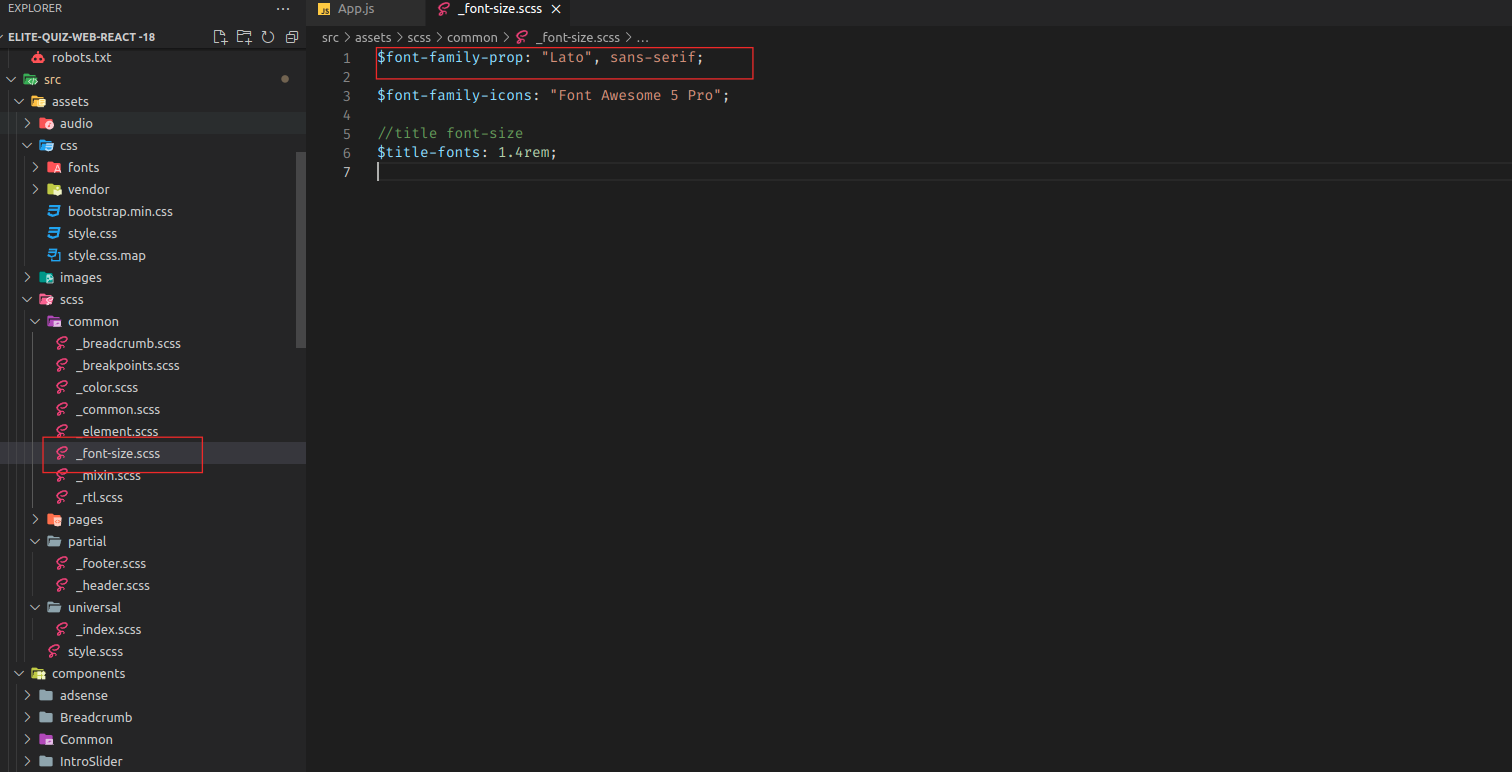
- How to change application font
-
Go to YOUR_APP_FOLDER/src/assets/scss/common/_font-size.scss and add your font as shown in image
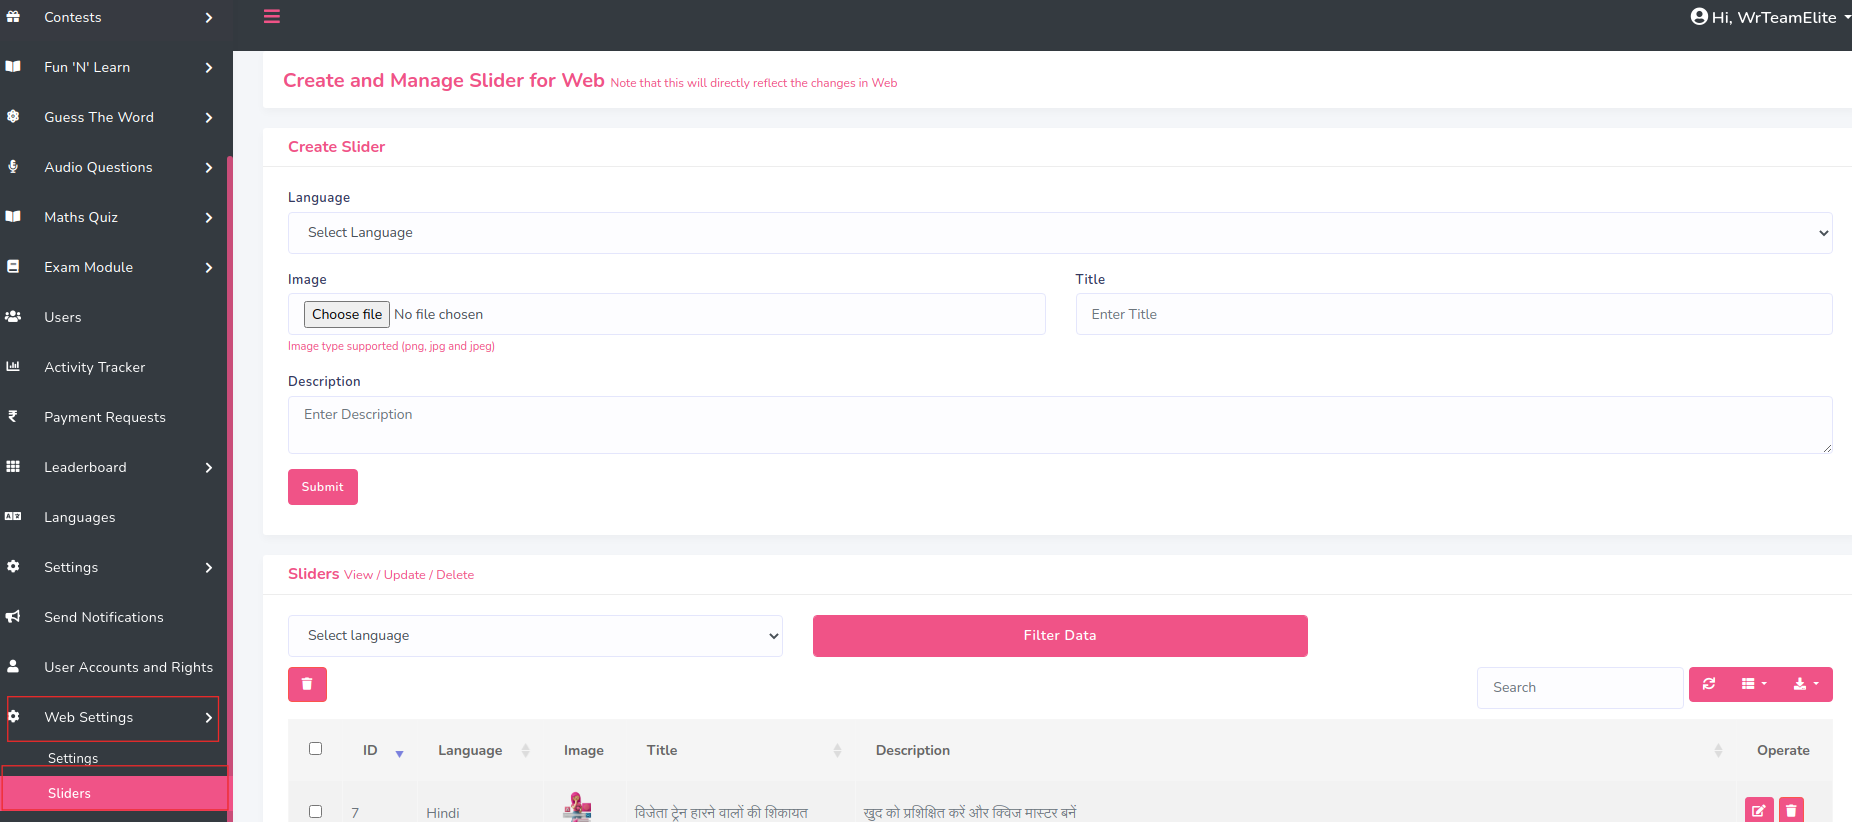
- How to Add Slider
-
Go to admin panel -> web settings -> slider
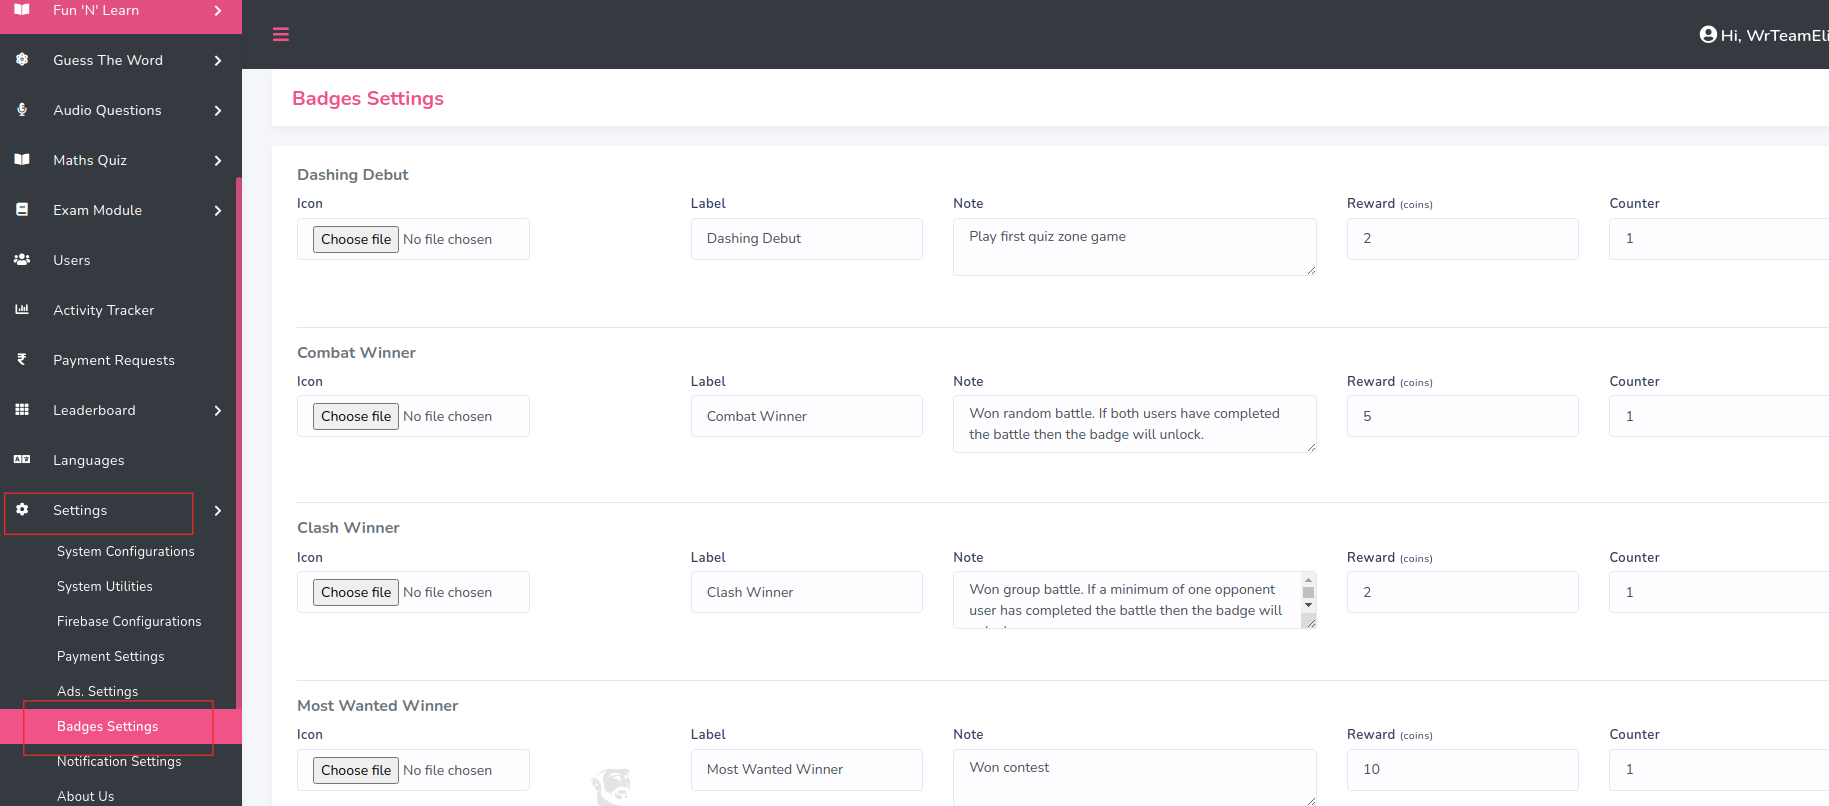
- How to Add Badges Images
-
Go to admin panel -> Settings -> Badges Settings
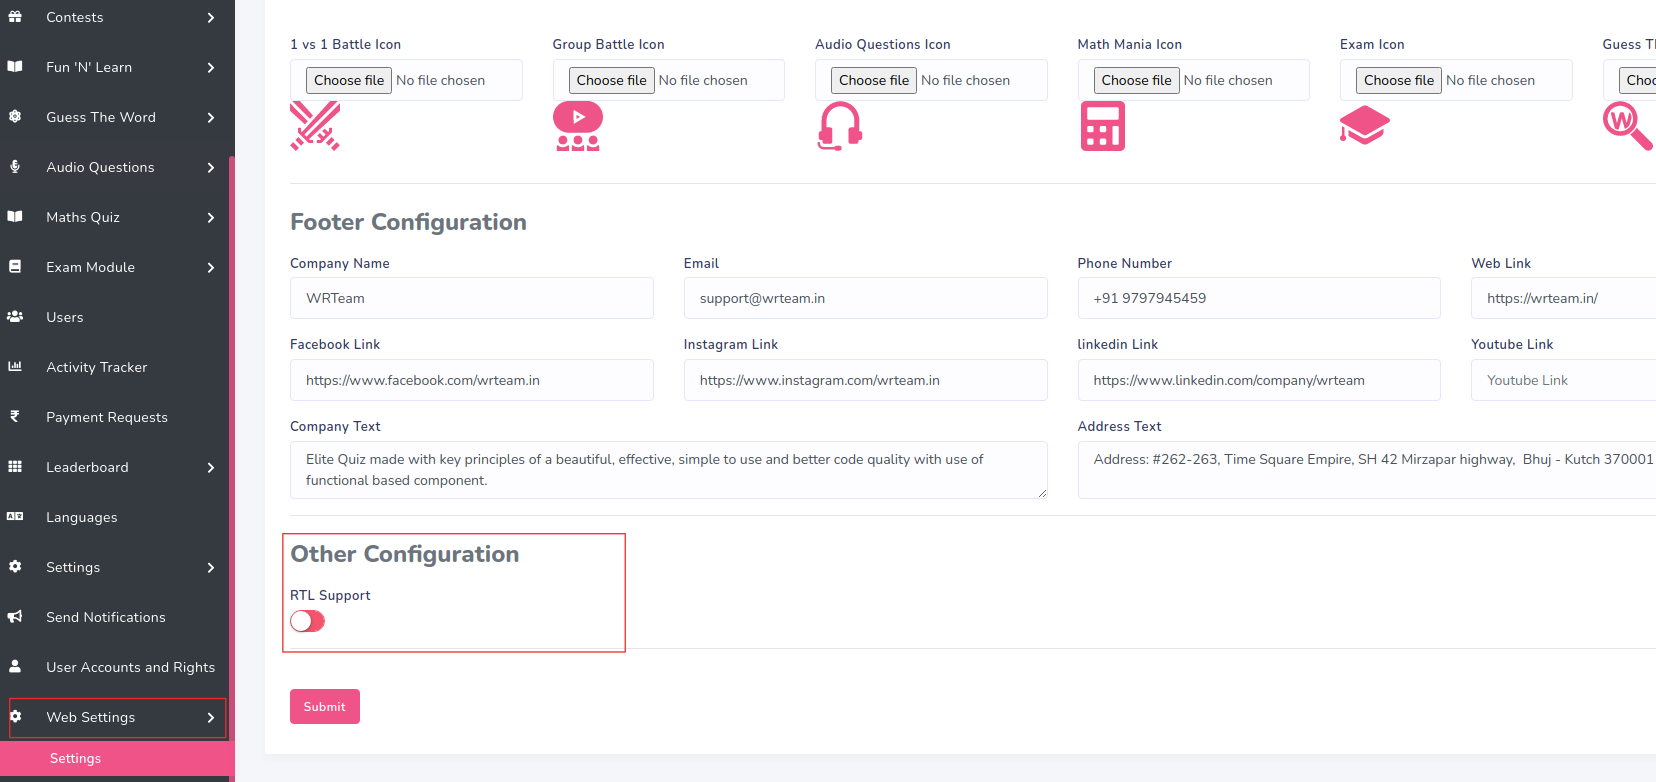
- How to Change LTR to RTL
-
Go to Admin Panel -> Web Settings -> Settings
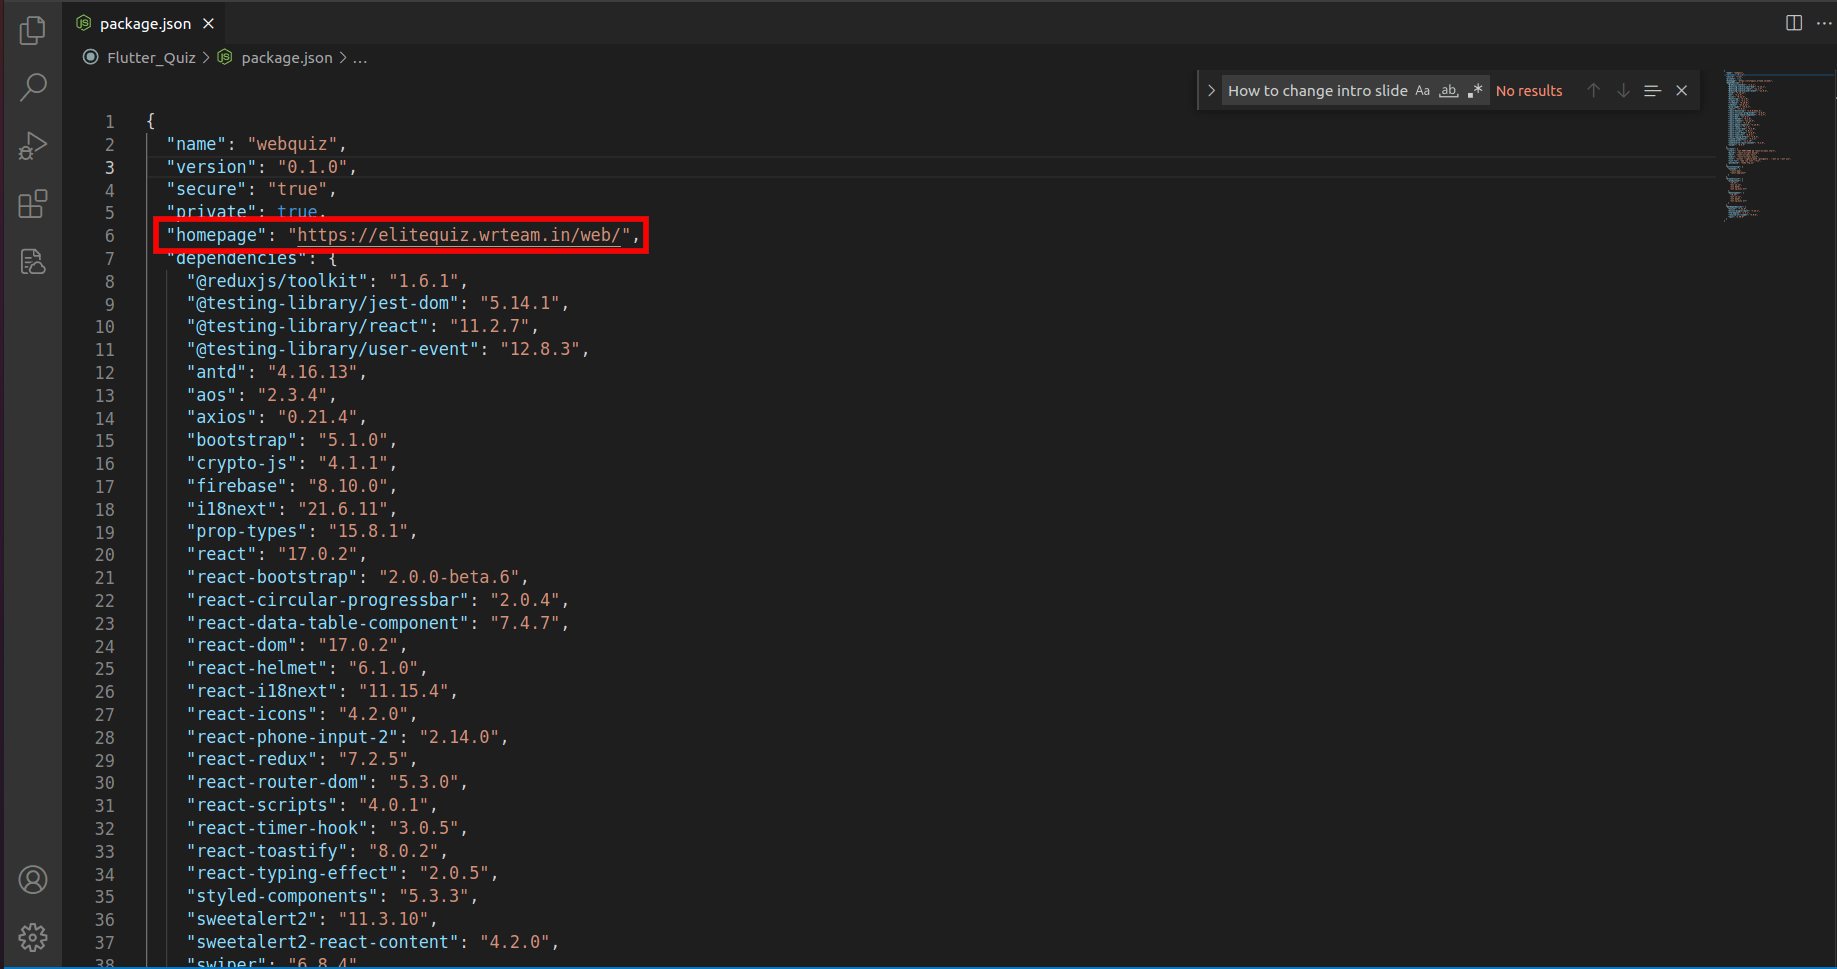
- How set the Domain URL
-
Go to package.json file and add your domain url in homepage variable. for ex, https://elitequiz.wrteam.in/
- How to deploy the Site
- After all the changes you are ready to deploy your Web applicaiton on Live Server.
-
Open VS Code teminal by typing CTRL+J in Windows/Linux, and for MacOS CMD+J and execute the command --> npm run build
This will take few seconds to build the live and the optimized version of the web application. -
After the process completion go to web`s code root files -> build folder and upload this files on your live server.
(only upload build folder's files on server do not upload any other file on server) - If you are facing any deployment related problems you can follow the official document : React App Deployment
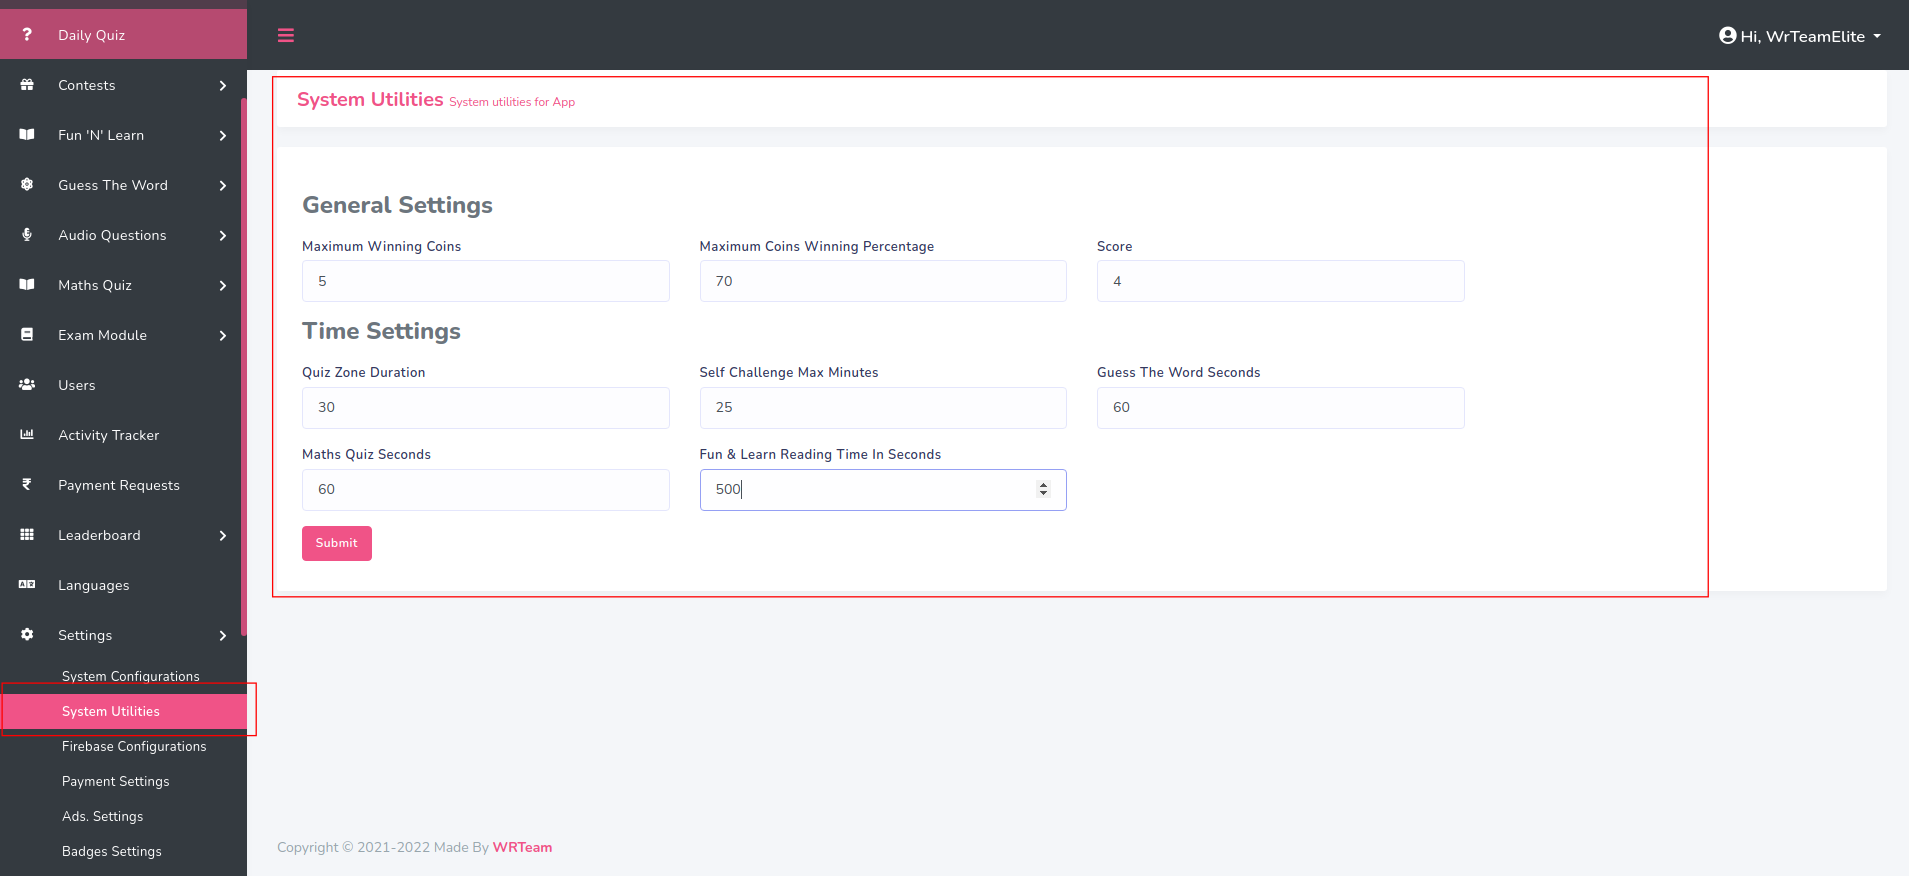
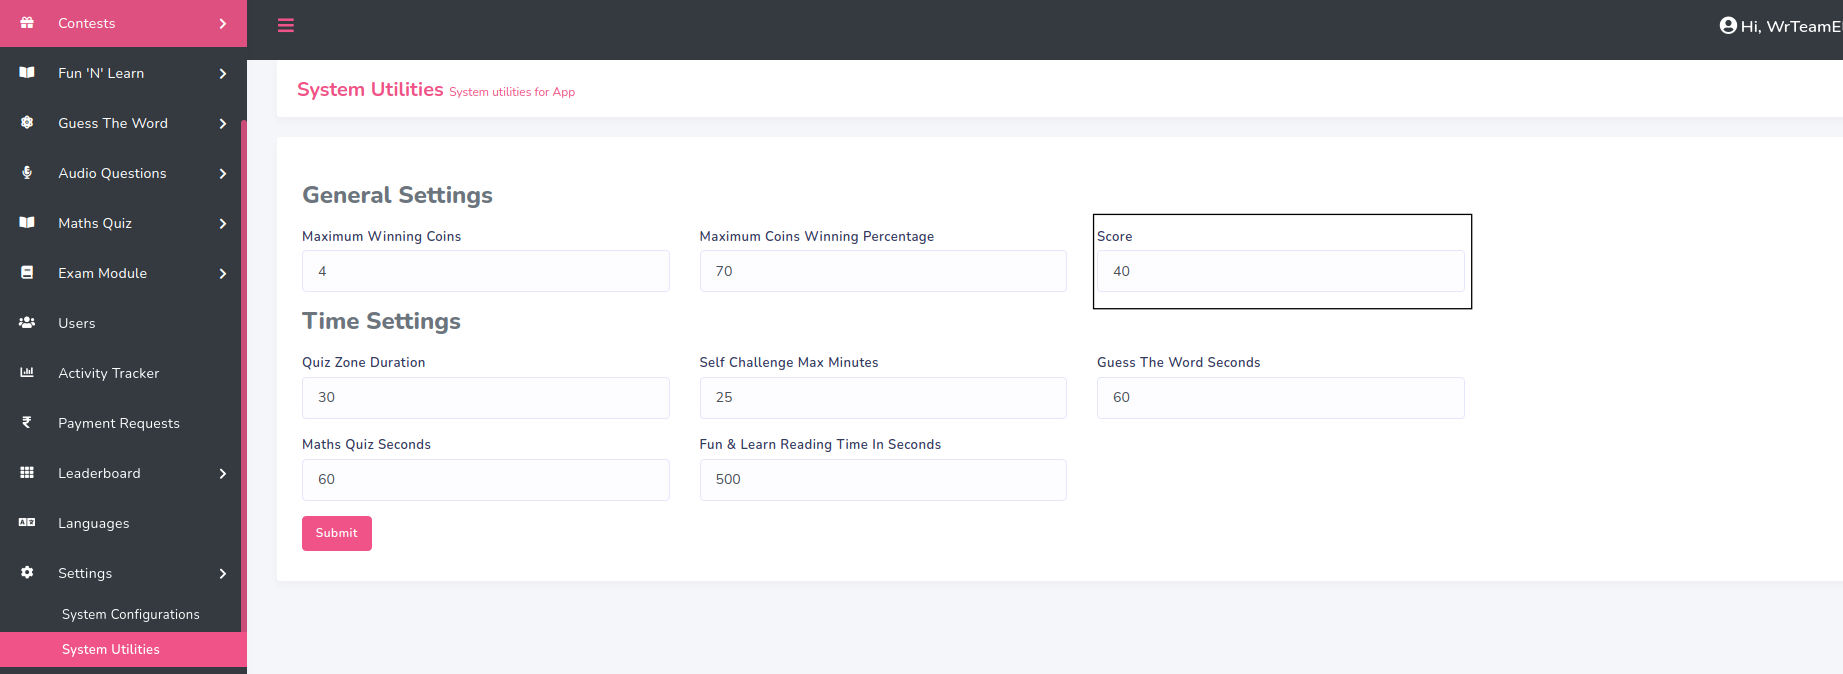
- How to change Timer seconds
- Go to Admin Panel -> Settings -> System Utilities
- How to disable quiz mode features
- Go to Admin Panel -> Settings -> System Configuration
- How to Add Score
- Go to Admin Panel -> Settings -> System Utilities
Elite Quiz Web App
Elite Quiz Web Version is built with React JS v17.0.2 so you need to setup your Local Computer First.Note:- If you already have purchased the App version of Elite Quiz and already created firebase project at that time then you can skip 4.1 step
------------------------------
Seo meta tags
Support
Delighted to serve and support you! Contact our support team led by Sumit Mayani on Skype
To help our customers, we constantly be in touch with every customer if they need any assistance regarding our product. We offer our customers a support from Mon – Fri 9.00am to 6.00pm IST (GMT +5.30) – We are a Team located in India – Asia.
Typically we reply our customers for all the questions and queries within 24 hours of time via comments, support forum or emails.
Your Feedback
Dear valuable customer, Thank you very much for choosing our product. It's our pleasure to serve top-notch service to you. Please give us your honest feedback that will help us to make a more strong and reliable product by click here Rate Us. Thank you very much.
Contact Us
WRTeam has creative and dedicated group of developers who are mastered in Apps Developments and Web Application Development with a nice in delivering quality solutions to customers across the globe. Contact us today to find out how we can help you or for freelance work.
Visit Us : https://wrteam.in
Mail Us : support@wrteam.in
Thank you very much.
Admin Panel`s Server Issues
Issue 1
1.png)
2.png)
Solution
- Go to Admin panel's code root files -> index.php and write:
ob_start();in new line after<?php
